Flowers
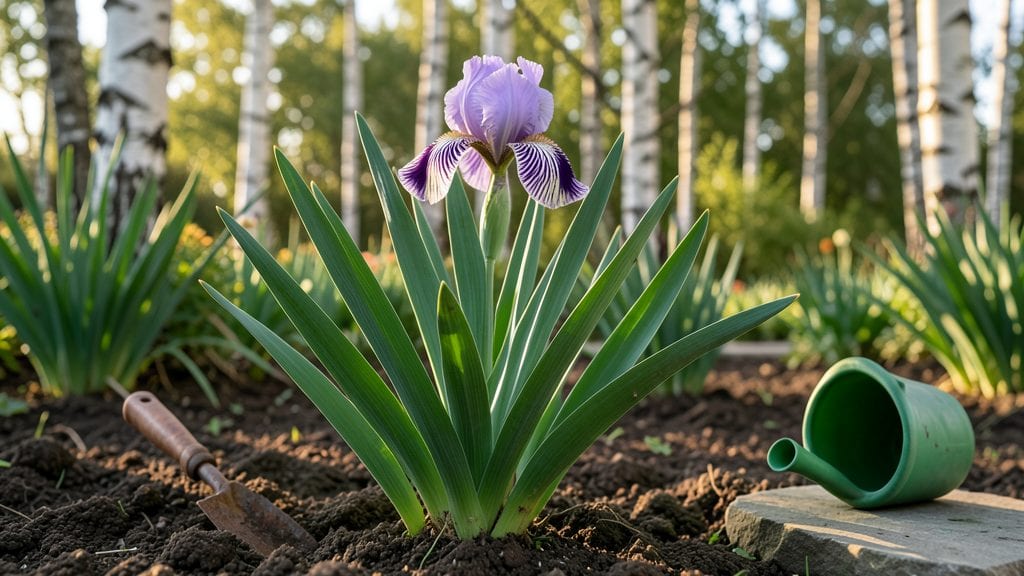
Growing zebra iris plants transforms any garden into a showstopper with their dramatic purple blooms and striking striped foliage—yet they demand shockingly little effort. 🌿 I've grown them for years, and once established, they thrive with almost no care, blooming reliably for decades in the right spot.
The secret lies in their soil and sunlight preferences: well-draining soil that's slightly alkaline and a sunny location with at least six hours of direct light daily. They tolerate drought once established, but their first year needs consistent moisture to root properly.
The bold striped leaves alone make them a statement plant, even before the flowers appear.
You'll get vibrant blooms from late spring through summer, with each stem producing 2-4 flowers that last nearly a week. The foliage stays ornamental even after blooming, creating year-round interest. Plus, they spread slowly through division, giving you free plants to share with neighbors every few years.
Perfect for borders, cottage gardens, or even container growing in warmer climates. With their striking appearance and low-maintenance nature, zebra irises prove you don't need high-drama plants for a high-impact garden. Let's get yours growing!
📚 In This Guide
- What you need
- Instructions
- Tips and common mistakes
- Wrapping up and next steps
What you need
- ● Zebra iris rhizomes: 3–5 healthy, firm rhizomes (ensure they have visible "eyes" or growth points).
- ● Well-draining potting mix: 2–3 gallons (for containers) or amend garden soil with perlite/sand (1 part perlite to 3 parts soil).
- ○ Container (optional but recommended for controlled growing): 1–2 large pots (12–16 inches deep) with drainage holes, or
- ● A raised garden bed (if planting outdoors).
- ● Slow-release fertilizer (5-10-5 or similar): 1–2 tablespoons per plant.
- ● Garden trowel or small shovel (for planting).
- ● Gloves (to protect hands from rhizome sharpness).
- ● Watering can or hose with gentle spray (avoid soaking the rhizomes).
- ○ Mulch (optional): 1–2 inches of pine bark or shredded leaves to retain moisture.
- ○ Stakes or supports (optional): For tall varieties in windy areas.
- ● A sunny spot with 6+ hours of direct sunlight daily.
- ● USDA Hardiness Zones 4–9 (adjust care for colder climates).
- ● Patience! Zebra irises thrive with minimal fuss but reward you with year-round drama.
Instructions for planting and cultivating zebra iris
Here’s how to establish these striking perennials for long-lasting, carefree blooms.
🌱 Step 1: Prepare the Planting Site
Zebra iris thrives in well-draining soil with full sun exposure (at least 6 hours daily). Choose a spot where the roots can spread freely—crowding leads to weak stems and fewer blooms. If your soil is heavy clay, amend it with 2-3 inches of coarse sand or perlite to improve drainage before planting.
Dig holes twice as wide as the root ball but no deeper—planting too deep smothers the rhizomes and prevents flowering. Loosen the soil at the bottom of each hole with a garden fork to encourage root penetration. Space plants 18-24 inches apart to allow air circulation and reduce fungal risks.
🪴 Step 2: Plant the Rhizomes Correctly
Remove the iris rhizomes from their container and gently separate them if clumped. Handle them carefully—they bruise easily, and damaged sections won’t root well. Position each rhizome so the top third is exposed above the soil line. This prevents rot while allowing the plant to absorb sunlight for energy.
Spread the roots outward into the hole, ensuring they fan naturally. Press the soil lightly around the base but avoid compacting it—iris roots need air to breathe. Water deeply right after planting to settle the soil and encourage root contact. Avoid overwatering now; soggy soil at this stage invites rot.
☀️ Step 3: Establish a Watering Routine
Zebra iris is drought-tolerant once established, but newly planted rhizomes need consistent moisture for the first 4-6 weeks. Water deeply once a week, aiming for 1 inch of water per session. Check soil moisture by digging down 2 inches—if it feels dry, water again. Overwatering is the biggest mistake here; yellowing leaves often signal root rot.
After the first growing season, reduce watering to every 2-3 weeks unless your region experiences extreme heat. Mulch with 2 inches of organic matter (like shredded bark) to retain moisture and suppress weeds, but keep mulch 6 inches away from the rhizomes to prevent rot.
✂️ Step 4: Prune and Maintain for Long-Term Blooms
Deadhead spent blooms by cutting the flower stalk 2 inches above the base once flowers fade. This redirects energy to root growth and next year’s blooms. Avoid cutting the fan of leaves—these photosynthesize to fuel the rhizomes. If leaves turn yellow or brown by late summer, trim them back by one-third to reduce disease risk.
Divide clumps every 3-4 years in early spring or fall. Lift the rhizomes, separate them with a sharp knife, and replant the healthiest sections. This prevents overcrowding and rejuvenates blooms. Fertilize lightly in early spring with a balanced, low-nitrogen formula (like 5-5-5) to support flowering without excessive foliage growth.
⏰ Step 5: Overwinter for Year-Round Performance
Zebra iris is cold-hardy in USDA zones 3-9, but mulch heavily in winter if temperatures drop below 20°F. Apply 4-6 inches of straw or shredded leaves over the rhizomes for insulation. In spring, remove mulch once new growth appears to prevent rot.
Watch for signs of stress, like mold on leaves or mushy rhizomes—these indicate winter damage. If you notice weak growth in spring, trim back any blackened or slimy sections and replant healthy rhizomes. With proper care, your zebra iris will reward you with bold, striped blooms for decades.
Tips & tricks for perfect zebra iris cultivation
These tried-and-true insights will help you cultivate vibrant zebra iris blooms that thrive with minimal fuss.
Soil Preparation Insight: When amending heavy clay soil with 2-3 inches of coarse sand or perlite, mix it thoroughly with the native soil to create a uniform texture. I've learned this the hard way—patchy amendments create drainage hotspots that can still lead to rot. For best results, use a garden fork to blend the materials down to at least 6 inches deep where the rhizomes will settle. This ensures consistent moisture control throughout the root zone.
Rhizome Positioning Secret: The exposed top third of your rhizomes is absolutely critical—this isn't just about preventing rot, it's about photosynthesis. Those upper sections need sunlight to fuel the entire plant. I always mark the rhizomes with a pencil before planting to ensure proper orientation, especially when working with multiple plants. This simple step can double your bloom production in the first season.
Watering Precision: That 1-inch weekly watering target during the first 4-6 weeks is non-negotiable, but timing matters just as much. Water in the morning so the foliage has all day to dry, which dramatically reduces fungal risks. I've found that using a rain gauge or measuring cup to track your watering ensures you're not overdoing it—zebra iris roots are surprisingly sensitive to excess moisture at this stage.
Overwintering Strategy: When temperatures drop below 20°F, don't just throw mulch on willy-nilly. Create a proper insulation layer by first adding 2 inches of straw directly over the rhizomes, then topping with 2-4 inches of shredded leaves. This layered approach mimics natural snow cover and prevents temperature fluctuations that can stress the plants. In spring, remove mulch gradually as new growth appears—never all at once.
Pro Tips for Zebra Iris Plants
- These tried-and-true insights will help you cultivate vibrant zebra iris blooms that thrive with minimal fuss.
- Soil Preparation Insight: When amending heavy clay soil with 2-3 inches of coarse sand or perlite, mix it thoroughly ...
- Rhizome Positioning Secret: The exposed top third of your rhizomes is absolutely critical—this isn't just about preve...
Frequently asked questions
Got questions about growing zebra iris plants? You’re not alone! Here are some of the most common queries—plus quick, practical answers to help you succeed with these striking striped beauties.
How often should I water my zebra iris plants?
Zebra irises are drought-tolerant once established (after 1–2 years). Water deeply once a week during the first year, then reduce to every 2–3 weeks unless your region is extremely hot or dry. Overwatering can rot their rhizomes—soak the soil, then let it dry out before watering again.
Why aren’t my zebra iris leaves turning striped?
Striped foliage is a slow process—it can take 2–3 years for new growth to show bold zebra stripes. If your plant isn’t developing stripes, check for:
- Low light (they need full sun for 6+ hours daily).
- Over-fertilizing (use a low-nitrogen fertilizer in early spring).
- Young age (patience is key!).
When is the best time to plant zebra iris rhizomes?
Plant them in early spring (just as new growth starts) or late summer/early fall (6–8 weeks before frost). Avoid winter planting—they need time to establish roots before cold weather. Choose a spot with well-draining soil and bury rhizomes partially (top should peek above soil).
Are zebra irises deer- or rabbit-resistant?
While not completely deer-proof, zebra irises are less appealing than many other perennials. Deer may nibble if hungry, but rabbits usually avoid them. For extra protection, add a light mulch or companion plants like lavender or rosemary, which deer dislike.
Can I grow zebra irises in containers?
Yes! Use a large container (at least 12" deep) with fast-draining mix (add perlite or sand). Plant 2–3 rhizomes per pot and place in full sun. Containers dry out faster, so monitor soil moisture closely. Dwarf varieties like ‘Georgia’ work best for pots.
Wrapping up and next steps
Zebra iris plants are the perfect low-maintenance superstars for adding bold, striking beauty to your garden with minimal effort. Their striking striped blooms and adaptability make them a favorite for both beginners and seasoned gardeners alike—plus, they thrive in a variety of conditions! 🌿✨
Ready to level up your garden game? Grab your zebra iris plants, pick a sunny spot, and let nature do the rest. Start planting today—your future blooms will thank you!