Orchid Care
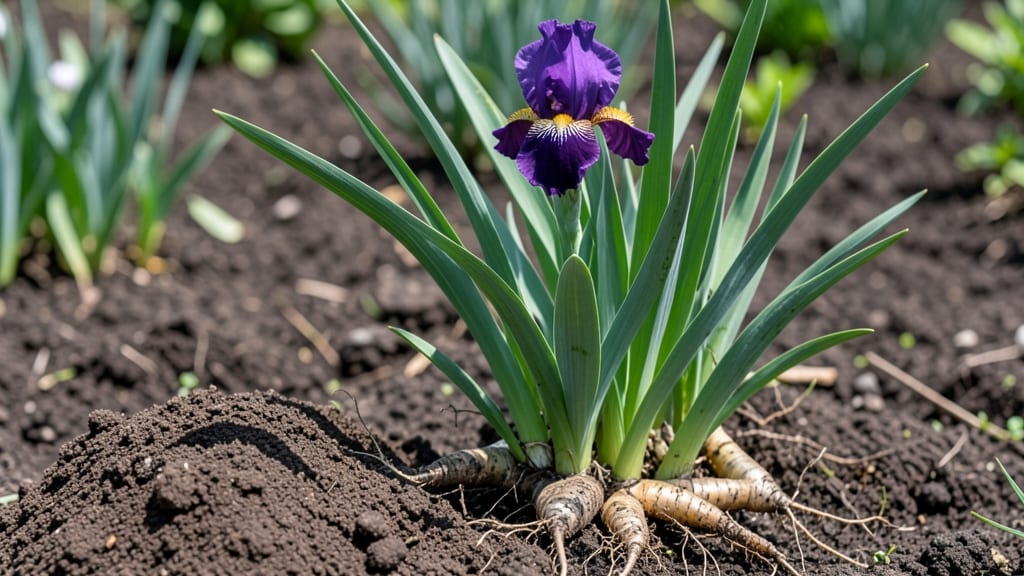
Planting iris roots in well-draining soil transforms your garden into a springtime explosion of color—those classic sword-shaped leaves and dramatic blooms are worth every minute of prep.
I’ve planted dozens of irises over the years, and the difference between a thriving clump and a struggling one comes down to just a few key steps: timing, placement, and soil.
Most people overlook the rhizomes’ need for sunlight and air circulation, which is why so many irises fail to rebloom. The good news? Once you get it right, these perennials multiply like crazy and reward you with blooms for decades.
Here’s the thing—iris roots aren’t like other bulbs. They’re thick, fleshy rhizomes that need to sit half above soil to avoid rotting, and they crave full sun (at least 6 hours daily) and sandy, gritty soil that drains fast.
I plant mine in late summer or early fall, when the soil is still warm but cooling down—this gives the roots time to establish before winter.
A shovel, some coarse sand or perlite, and a sunny spot are all you truly need, but the real magic happens in how you position those rhizomes. Skip the mulch pile over them, and you’ll end up with a sad, moldy mess.
After planting, the care is almost effortless. Water lightly for the first two weeks to help roots settle, then let nature take over—irises hate soggy feet.
By next spring, you’ll see those familiar upright leaves pushing through the soil, followed by sturdy stems topped with blooms in shades of purple, blue, yellow, or white. The best part? They spread over time, creating natural drifts that look like they belong in a botanical garden.
Pro tip: Divide clumps every 3-4 years to keep them vigorous and prevent overcrowding.
Whether you’re starting with a single rhizome or a whole batch, this method works for bearded, Siberian, or Japanese irises alike. The key is patience—first-year blooms might be sparse, but once established, these plants are nearly indestructible.
Grab your gloves, and let’s get those irises in the ground before the season slips away.
📚 In This Guide
- What you need
- Instructions
- Tips and common mistakes
- Wrapping up and next steps
What you need
- ● Iris roots: Healthy rhizomes (thick, firm stems) with at least one fan of leaves. Aim for 3-5 rhizomes per plant for a fuller look.
- ● Well-draining soil: Mix 2 parts garden soil with 1 part compost or sand (irises hate soggy roots!).
- ● Garden fork or trowel: For digging trenches 4-6 inches deep (rhizomes should sit half-buried).
- ● Organic mulch: 2-3 inches of straw, pine needles, or shredded bark to retain moisture and suppress weeds.
- ● Watering can or hose: With a gentle spray nozzle for deep but controlled watering.
- ○ Gloves (optional but recommended): Iris roots can be sharp—protect your hands!
- ● Slow-release fertilizer: Mix 1-2 tbsp of 5-10-10 formula into the soil for a nutrient boost.
- ● Epsom salt: Sprinkle 1 tbsp around the base annually to prevent yellowing leaves.
- ● Plant markers: Label your iris varieties if you’re growing multiples (trust us, you’ll thank yourself later!).
- ● Compost tea or seaweed extract: A weekly spray during the growing season for extra vigor.
Foolproof steps for planting iris roots
Here’s how to get your iris roots settled in for years of bold, colorful blooms—no guesswork involved.
Prepare the Planting Site
Choose a spot with full sun—at least 6 hours of direct light daily—and well-draining soil. Iris roots thrive in slightly sandy or gravelly soil, so if yours is heavy clay, mix in 2-3 inches of coarse sand or perlite per square foot. I like to work the soil to a depth of 12 inches, breaking up any compacted layers to encourage root spread.
Test the soil’s drainage by digging a 6-inch-deep hole and filling it with water. If it drains completely within 2 hours, your site is ready. If not, amend with more sand or consider planting in a raised bed. Avoid low-lying areas where water pools after rain—iris roots rot quickly in soggy conditions.
Acclimate the Roots Before Planting
Soak the iris roots in lukewarm water for 1-2 hours before planting. This rehydrates them after dormancy and helps them establish faster. I place them in a bucket of water, ensuring the roots are fully submerged but the fans (the leafy tops) stay dry. After soaking, let them sit for 30 minutes to drain excess water.
While the roots are soaking, prepare the planting holes. Space them 12-18 inches apart in rows 2-3 feet apart to allow for airflow and future growth. Dig holes 3-4 inches deep, just enough to accommodate the roots without bending them. If planting in fall, aim for 4-6 weeks before the first frost—this gives roots time to settle before winter.
Position and Plant the Roots
Place the iris roots in the hole with the fans (leafy tops) facing upward and the roots spreading outward. The rhizomes (thick, horizontal roots) should sit just above the soil line—never buried. If they’re too deep, they’ll rot; if too high, they’ll dry out. I like to mound a small pile of soil around the base to support the fans and keep them upright.
Cover the roots with 1-2 inches of soil, leaving the tops exposed. Gently firm the soil around the base to eliminate air pockets, but don’t pack it down tightly. This ensures the roots stay in place while allowing water to penetrate easily. Water lightly immediately after planting to help settle the soil without disturbing the roots.
Mulch and Water for Establishment
Spread a 2-inch layer of mulch (like shredded bark or gravel) around the base of the plants, keeping it 3-4 inches away from the fans to prevent rot. Mulch helps retain moisture and regulate soil temperature, but avoid piling it directly against the rhizomes. Water deeply once a week during the first growing season, ensuring the soil stays evenly moist but not soggy.
You’ll know your irises are settling in when new fan leaves emerge in early spring. These leaves should be bright green and firm, not yellow or wilted. If you see yellowing, it’s often a sign of overwatering or poor drainage—adjust your care accordingly. After the first year, irises become drought-tolerant, so reduce watering to every 2-3 weeks unless there’s a prolonged dry spell.
Maintain for Long-Term Blooms
Deadhead spent blooms by cutting the flower stalks back to the fan after they fade. This redirects the plant’s energy into root and leaf growth for next year’s blooms. I also trim any damaged or yellowed leaves in late fall to keep the plant tidy and reduce disease risk. Fertilize lightly in early spring with a balanced, low-nitrogen fertilizer (like 5-10-10) to encourage strong root development without promoting excessive foliage.
Divide clumps every 3-4 years when they become overcrowded. Lift the rhizomes in early fall, separate the fans, and replant the healthiest sections. This rejuvenates the plant and prevents blooms from fading over time. With proper care, your irises will reward you with vibrant, long-lasting blooms for decades.
Tips & tricks for planting iris roots
A few key strategies will help you avoid common pitfalls and ensure your irises thrive for years to come.
Soil Preparation is Everything: In Step 1, don't rush the soil test. The 2-hour drainage check is critical—if water lingers beyond that, you'll need to amend with more sand or gravel. I've seen irises fail because people skipped this step, thinking their soil looked fine. Trust me, that 2-hour wait prevents root rot before it starts. For heavy clay, mix in perlite rather than just sand—it breaks up compaction better while still improving drainage.
Timing Matters for Fall Planting: When planting in fall, the 4-6 week window before frost is non-negotiable. Roots need time to establish before winter dormancy. I've planted irises too close to frost and lost entire clumps. If your first frost is unpredictable, err on the earlier side—better to have roots settled than struggling to adapt. Mark your calendar now so you don't miss this critical window.
Positioning Prevents Problems: In Step 3, pay special attention to the rhizome placement. The tops should sit just above soil level—never buried. I learned this the hard way when my first batch rotted because I buried them too deep. Use a small mound of soil behind the fans to keep them upright, especially in windy areas. This simple technique prevents the classic "leaning iris" look that ruins the plant's natural shape.
Watering Wisdom: The once-weekly watering in Step 4 is perfect for the first year, but timing matters. Water in the morning so leaves dry completely before evening. I've seen yellowing leaves from nighttime watering that never fully dried. After the first year, let the soil dry between waterings—irises are surprisingly drought-tolerant once established. The key is that bright green color you'll see in Step 4—if leaves start yellowing, you're either overwatering or have poor drainage.
Pro Tips for Planting Iris Roots
- A few key strategies will help you avoid common pitfalls and ensure your irises thrive for years to come.
- Soil Preparation is Everything: In Step 1, don't rush the soil test. The 2-hour drainage check is critical—if water l...
- Timing Matters for Fall Planting: When planting in fall, the 4-6 week window before frost is non-negotiable. Roots ne...
Frequently asked questions
Got questions about planting iris roots? You’re not alone—even seasoned gardeners need a little guidance now and then! Here are answers to the most common queries to help you grow stunning irises with confidence.
When is the best time to plant iris roots?
The ideal time is early fall (6–8 weeks before the first frost) or late winter (just as new shoots emerge). Planting in fall gives roots time to establish before winter, while spring planting works if you’re in a mild climate. Avoid planting in summer heat—roots can dry out or rot.
How do I know if my iris roots are healthy enough to plant?
Healthy iris roots should be plump, firm, and white or light tan with no mushy spots or dark discoloration. Discard any roots that are shriveled, hollow, or smelly—these may be diseased. A few brown tips are normal, but avoid planting roots with extensive damage.
How long does it take for iris roots to establish and bloom?
With proper care, iris roots typically establish in 1–2 years. You may see foliage the first spring, but full blooms often take 2–3 years, especially if planted in fall. Patience pays off—well-established irises can bloom for decades!
Can I plant iris roots in containers instead of the ground?
Irises thrive in containers with drainage holes, using a mix of potting soil, perlite, and sand. Choose a pot at least 12 inches deep and wide. Just ensure they get full sun (6+ hours/day) and water deeply but infrequently to mimic their natural drought tolerance.
Why aren’t my iris roots blooming, even after planting?
Common culprits include too much fertilizer (which boosts foliage but not flowers), overcrowding (divide clumps every 3–4 years), or poor sunlight. Also, check for slugs or iris borers—these pests can damage roots. If blooms are sparse, try reducing nitrogen and increasing phosphorus/potassium in fertilizer.
Still stumped? Drop your iris-growing challenges in the comments—we’re happy to help troubleshoot!
Wrapping up and next steps
Planting iris roots is a rewarding way to welcome those stunning spring blooms into your garden! 🌸 With the right timing, soil prep, and care, your irises will thrive for years. Remember, patience and consistency are key—soon, you’ll be enjoying vibrant blooms that’ll make your neighbors green with envy.
Ready to take the next step? Mark your calendar for next year’s planting season and start gathering supplies now. Happy gardening—your future iris show is just around the corner! 🌱