How To
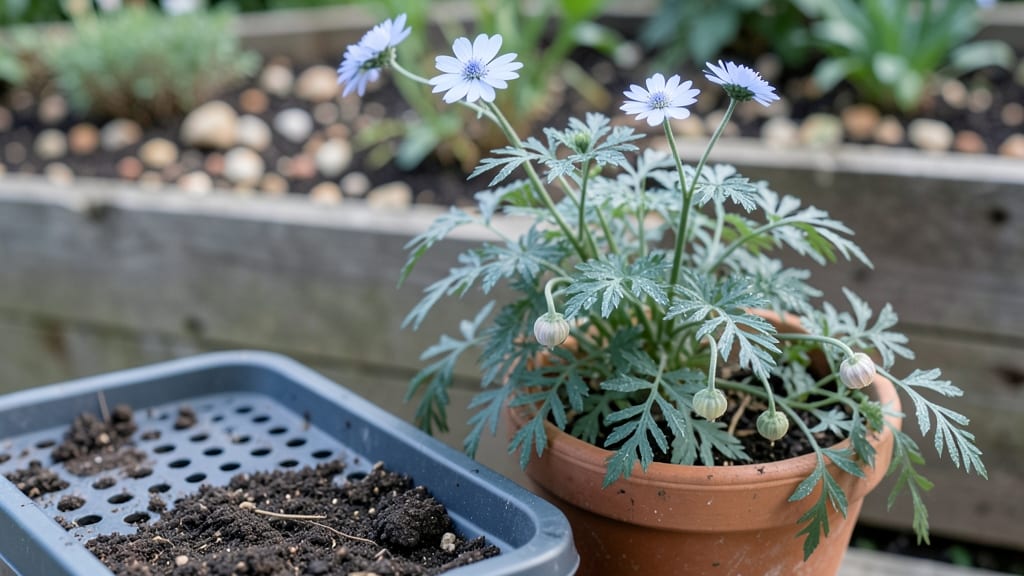
Planting Nigella sativa in well-drained soil during March–April unlocks a fragrant, low-maintenance herb with culinary and ornamental magic.
Picture this: delicate 🌱 blooms swaying in your garden, their seeds later used to spice dishes or steeped for tea—all from seeds you planted yourself. Yet many gardeners hesitate, unsure whether their soil or climate is right for this finicky but rewarding plant.
Black cumin thrives in full sun and USDA Zone 6a, but the real secret lies in spacing seeds 6–12 inches apart and avoiding soggy soil. Skip the guesswork with the right prep, and you’ll harvest seeds by June–August—no green thumb required.
Below, I’ll walk you through every step: from soil tests to watering tricks, plus how to troubleshoot slow starts or leggy seedlings. By the end, your Nigella sativa will be the star of your garden—and your kitchen.


Optimal sunlight, soil, and spacing requirements for Nigella sativa seeds
Nigella sativa thrives when given the right growing conditions, and understanding its sunlight, soil, and spacing needs is key to success. This delicate yet resilient annual herb demands precise care to produce those prized black cumin seeds and stunning lacy blue flowers. Let’s break down what your Nigella sativa truly needs to flourish.
First, sunlight exposure is non-negotiable for this plant. While full sun is ideal, partial shade can work in hotter climates—just expect slightly smaller plants. The soil composition must be well-draining, with a slightly alkaline to neutral pH level (6.0–7.5).
Poor drainage or overly acidic soil can stunt growth or even kill your seedlings before they start.
Now, let’s talk spacing. Proper spacing ensures airflow and prevents disease, while also allowing each plant to reach its 1.5–2-foot mature height without competition. Crowding can lead to leggy stems and reduced seed production—something no gardener wants when aiming for a bountiful harvest.
Here’s a quick reference for your Nigella sativa growing conditions:
| Category | Requirement | Specification |
|---|---|---|
| Sunlight | Ideal Exposure | 6–8 hours full sun daily |
| Sunlight | Partial Shade Tolerance | Hot climates: 4–6 hours sun |
| Soil | Drainage | Well-draining, no standing water |
| Soil | pH Level | 6.0–7.5 (slightly alkaline) |
| Spacing | Row Spacing | 12–18 inches apart |
| Spacing | Between Plants | 6–9 inches apart |
| Regional Adaptation | Hot/Dry Climates | Use mulch to retain moisture |
| Regional Adaptation | Cool Climates | Extend season with row covers |
For sunlight, I’ve found that morning sun is ideal, especially in regions with intense afternoon heat. If you’re in USDA zones 6–9, aim for a south-facing garden bed to maximize exposure.
In cooler zones (like zones 3–5), a west-facing spot can help the plants bask in warmth without scorching.
When it comes to soil composition, amending your garden bed with compost or sand can improve drainage if your native soil is heavy clay.
A simple soil test (available at garden centers) will confirm your pH level—if it’s too acidic, add lime to adjust. Organic matter like well-rotted manure or leaf mold also boosts fertility without overwhelming the plant.
Proper spacing is often overlooked, but it’s critical for Nigella sativa. Plant seeds 6–9 inches apart in rows 12–18 inches apart to prevent overcrowding. This spacing allows air to circulate, reducing the risk
Step-by-step planting guide: when, how, and where to sow Nigella sativa seeds
Timing is everything when planting Nigella sativa seeds, and I’ve found that spring after the last frost—typically March to April—is ideal for most climates. However, you can also sow seeds in early fall (September) for a late-winter harvest.
This self-seeding annual thrives in cool weather, so avoid planting when temperatures exceed 85°F. I recommend checking your USDA zone to fine-tune timing—zones 6-9 offer the best conditions for consistent germination.
For soil preparation, focus on well-draining, slightly alkaline soil with a pH between 6.0 and 8.0. Amend heavy clay with compost or sand to prevent waterlogging, which can drown delicate seedlings.
I like to add a light layer of compost (1-2 inches) and mix in a balanced fertilizer (5-10-10) at planting time to give young plants a nutrient boost without overfeeding. A raised bed works wonders if your native soil is compacted or poorly draining.
🌱 Step-by-Step Planting Process
-
Step 1: Choose Your Method
Direct sowing outdoors is easiest. For early starts, sow indoors 4-6 weeks before last frost in biodegradable pots. -
Step 2: Prepare Seedbeds
Loosen soil to 12 inches deep, removing weeds and rocks. For containers, use well-draining potting mix with perlite. -
Step 3: Sow Seeds Correctly
Plant seeds ¼ inch deep in rows spaced 12-18 inches apart. For containers, place 2-3 seeds per pot. Thin seedlings to 6-8 inches apart once they’re 2 inches tall. -
Step 4: Water Gently
Keep soil consistently moist (not soggy) with a spray bottle or fine mist. Avoid overhead watering to prevent fungal diseases like damping-off. -
Step 5: Harden Off (Indoor Starts)
If starting indoors, acclimate seedlings 1 week before transplanting by placing them outside for 2-3 hours daily, increasing time gradually. -
Step 6: Transplant Carefully
Transplant seedlings outdoors after true leaves appear (not just cotyledons). Space them 8-12 inches apart in full sun for best growth. -
Step 7: Mulch and Monitor
Apply 1 inch of mulch (straw or shredded leaves) to retain moisture. Watch for slugs—use beer traps or diatomaceous earth if needed.
After planting, moisture control is critical. Nigella sativa seeds need consistent but not soggy soil to germinate, which typically takes 7-21 days. I’ve noticed that morning watering (before 10 AM) reduces fungal risks while keeping roots hydrated.
Once seedlings emerge, reduce watering slightly—overwatering is the #1 killer of young plants. Aim for 1 inch of water per week, adjusting for rain.
Post-planting care focuses on minimal intervention. This hardy annual self-seeds prolifically, so you’ll often find volunteers popping up the next year. To encourage strong stems, I pinch back leggy seedlings at 4-6 inches tall to promote bushier growth.
Avoid heavy fertilization—too much nitrogen leads to lush foliage but fewer seeds. Instead, side-dress with compost tea every 4-6 weeks during the growing season for a gentle nutrient boost.
With proper timing and care, your Nigella sativa will reward you with fragrant blooms and edible seeds by mid-summer. The key is patience—these seeds germinate slowly but grow into resilient plants that thrive with minimal fuss.
Once established, they’re drought-tolerant and pest-resistant, making them a low-maintenance superstar for any garden.