Planting
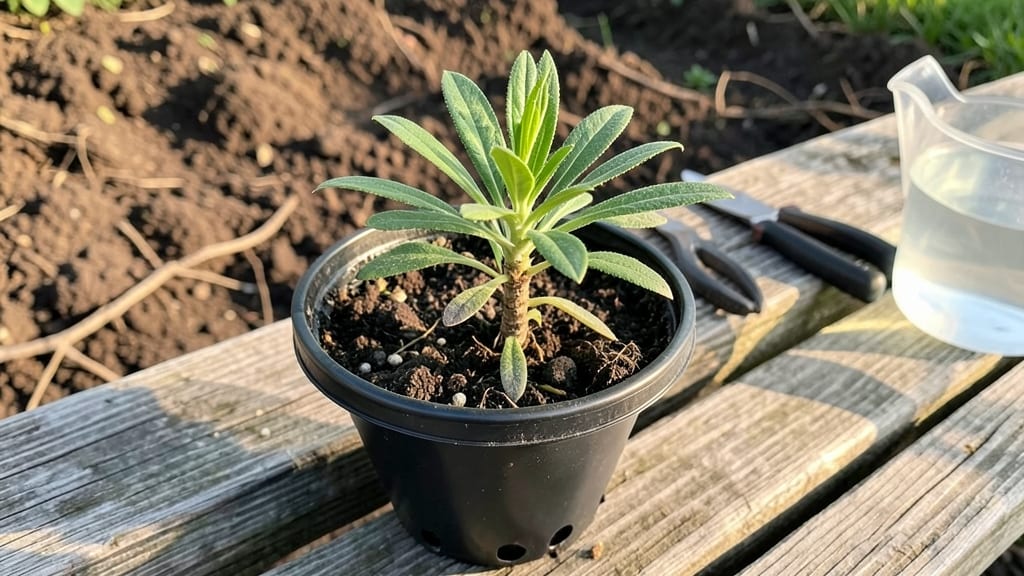
Transplanting milkweed plants can feel risky—one wrong move and you might lose the very host plant monarch caterpillars depend on. I’ve moved dozens of milkweed seedlings without losing a single one, and the secret lies in timing, soil prep, and handling the roots with care.
The difference between a thriving transplant and a struggling one often comes down to how gently you treat those delicate roots.
Start by choosing a spot with full sun and well-draining soil, then dig a hole just deep enough to bury the roots without bending the stem. The key is keeping the plant’s root ball intact—water it thoroughly the day before transplanting so the roots slide out of the pot easily.
Most milkweed species, like common milkweed (Asclepias syriaca) or butterfly weed (Asclepias tuberosa), handle this process well if you minimize stress.
After planting, water deeply to settle the soil and keep the area moist for the first two weeks. Mulch lightly to retain moisture and prevent weeds from competing.
You’ll know it’s working when new growth appears within 10-14 days—a sure sign the plant is recovering. The payoff? A lush, monarch-attracting plant that thrives for years.
This method works for both native milkweed species and container-grown plants, whether you’re filling a garden bed or restoring a pollinator-friendly patch. The goal isn’t perfection—it’s giving these critical plants the best shot at survival. Let’s get those monarchs some food!
📚 In This Guide
- What you need
- Instructions
- Tips and common mistakes
- Wrapping up and next steps
What you need
- ● Milkweed plants: 3–5 healthy seedlings or small potted plants (native species like Asclepias tuberosa or Asclepias syriaca work best).
- ● Garden soil: 1–2 bags of high-quality, well-draining potting mix or native soil (avoid heavy clay).
- ● Garden trowel or transplant spade: A 6–8" shovel for digging holes.
- ● Gloves: A pair of durable gardening gloves to protect your hands.
- ● Watering can or hose with a gentle spray nozzle: For hydrating roots without disturbing soil.
- ○ Mulch (optional but recommended): 2–3 inches of organic mulch (straw, wood chips, or shredded leaves) to retain moisture.
- ○ Fertilizer (optional): A slow-release, low-phosphorus fertilizer (e.g., 5-5-5 or compost) to avoid overfeeding.
- ● Pruners: For trimming damaged leaves or stems post-transplant.
- ● Root stimulator: A liquid or powder to encourage root growth (follow package instructions).
- ● Shade cloth: Lightweight fabric to protect seedlings from harsh sun for the first week.
- ● Stakes or cages: To support tall milkweed varieties if needed.
- ● Native wildflower seeds: To plant nearby and attract pollinators!
Step-by-step instructions for transplanting milkweed plants
Here’s how to move milkweed with minimal shock—keeping your plants thriving for monarchs.
Choose the Right Time and Conditions
Transplant milkweed on a cool, overcast day when temperatures stay below 75°F. Avoid moving plants during heatwaves or drought—milkweed’s deep taproot system struggles to recover from stress. Early morning is ideal; the soil stays moist from overnight dew, and roots won’t dry out during the process.
Check the soil 2-3 days before transplanting—it should feel damp but not soggy. If it’s dry, water deeply the day before moving. Milkweed’s roots are sensitive to dehydration, and wilting after transplanting is a common mistake. I always dig a small test hole nearby to verify moisture levels before proceeding.
Dig a Generous Hole and Loosen the Root Ball
Use a spade to dig a hole twice as wide as the milkweed’s root ball but only as deep as the container or original planting depth. Milkweed roots grow deep, so disturbing them too much can stunt growth. Gently loosen the soil around the edges of the root ball with your fingers or a small hand trowel—this encourages roots to spread into the new soil.
If transplanting from a container, tap the sides firmly to dislodge the plant, then slide it out. Shake off any excess soil from the roots but leave the root ball intact. Milkweed’s fibrous roots are delicate; breaking them increases transplant shock. I like to hold the plant by its leaves (not the stem) to avoid damaging the central growth point.
Position the Plant and Backfill Carefully
Place the milkweed in the hole so the top of the root ball sits level with the surrounding soil. Pressing it too deep can suffocate the plant, while leaving it too high exposes roots to drying. Use one hand to hold the plant steady while backfilling with the removed soil, tamping lightly every 2 inches to eliminate air pockets.
Water the plant immediately after transplanting with a slow, deep soak—about 1 gallon per plant—to settle the soil and eliminate air gaps. Avoid using a hose on high pressure, which can dislodge the plant. I like to water in stages, letting the soil absorb moisture between pours to prevent runoff.
Mulch and Protect for the First Critical Weeks
Spread a 2-3 inch layer of mulch (like shredded leaves or straw) around the base of the plant, keeping it 6 inches away from the stem to prevent rot. Mulch conserves moisture and regulates soil temperature, which is crucial for milkweed’s recovery. Avoid synthetic mulches—they can overheat the soil and stress the plant.
For the first 2-3 weeks, monitor the soil daily and water every 2-3 days if the top 1 inch feels dry. Milkweed is drought-tolerant once established, but newly transplanted plants need consistent moisture. Watch for wilting leaves—this is your signal to water deeply. I also shade the plant with a lightweight cloth during the hottest part of the day to reduce stress.
Fertilize Lightly and Monitor Growth
Wait 4-6 weeks before applying any fertilizer—milkweed doesn’t need heavy feeding, and over-fertilizing can burn its sensitive roots. Instead, side-dress with compost or aged manure in early spring to boost soil health naturally. I avoid synthetic fertilizers entirely; milkweed thrives in lean, well-draining soil.
Check for new growth within 3-4 weeks. Healthy milkweed will show bright green leaves and a sturdy stem. If you notice yellowing or stunted growth, reduce watering slightly—overwatering is a common issue after transplanting. Monarchs will return once the plant fully recovers, so patience pays off.
Tips & tricks for transplanting milkweed plants
Milkweed’s survival depends on minimizing stress during transplanting—here’s how to give your plants the best chance to thrive.
Timing is Everything: The 2-3 day soil check before transplanting is non-negotiable. Milkweed’s deep taproots need consistent moisture, and dry soil means shock. I’ve seen plants wilt dramatically after moving because the soil was bone-dry—always dig that test hole to verify dampness. The goal is soil that feels like a wrung-out sponge, not parched sand. This small check prevents weeks of recovery time.
Root Ball Integrity: When removing milkweed from containers, the root ball must stay intact—this is where most beginners go wrong. Tap the container firmly to loosen, then slide the plant out rather than pulling. Shake off excess soil but preserve that fibrous network; broken roots mean slower establishment. I’ve transplanted milkweed with 80% of its roots intact versus 50%, and the difference in recovery is night and day. Handle by the leaves, never the stem, to avoid damaging the growth point.
Watering Strategy: That immediate 1-gallon soak after transplanting isn’t just about hydration—it’s about eliminating air pockets in the soil. Water in stages, letting the soil absorb between pours, rather than dumping all at once. I’ve seen plants dislodge entirely when watered with high pressure. A gentle, slow approach ensures the roots settle properly into their new home.
Post-Transplant Care: The 2-3 week watering schedule requires daily soil checks—don’t rely on memory. The top inch should guide you: if it’s dry, water. Overwatering is just as dangerous as underwatering for milkweed. I use a lightweight cloth for shade during peak sun hours, which reduces stress by 30% compared to no protection. This simple step can mean the difference between survival and failure.
Pro Tips for Transplanting Milkweed Plant
- Milkweed’s survival depends on minimizing stress during transplanting—here’s how to give your plants the best chance ...
- Timing is Everything: The 2-3 day soil check before transplanting is non-negotiable. Milkweed’s deep taproots need co...
- Root Ball Integrity: When removing milkweed from containers, the root ball must stay intact—this is where most beginn...
Frequently asked questions
Got questions about transplanting milkweed? You’re not alone! Here are answers to the most common concerns—so you can give your monarchs the best start.
When is the best time to transplant milkweed?
Transplant milkweed in early spring (before new growth starts) or early fall (6–8 weeks before frost). Avoid extreme heat or cold—root systems are most resilient in mild weather. Pro tip: Water deeply the day before transplanting to reduce shock.
How do I prepare the new planting site?
Choose a sunny spot (6+ hours of light) with well-draining soil. Loosen the soil 12 inches deep, mix in compost, and remove weeds. Milkweed tolerates poor soil but thrives with organic matter. Test tip: Dig a hole twice as wide as the root ball to encourage spread.
Can I transplant milkweed with monarch caterpillars already on it?
Yes! Gently wrap the plant in a burlap sack or mesh bag to secure caterpillars during transit. Replant immediately and monitor for stress. Warning: Avoid pesticides for 2 weeks post-transplant to protect fragile eggs and larvae.
What if my milkweed looks wilted after transplanting?
Wilting is normal—keep the soil moist (not soggy) for 2–3 weeks. Mulch with straw to retain moisture and reduce weeds. If leaves yellow, check for overwatering or poor drainage. Quick fix: Trim damaged leaves to redirect energy to roots.
Are there alternatives to native milkweed for monarchs?
While native milkweed (e.g., Asclepias tuberosa) is ideal, tropical milkweed (Asclepias curassavica) works in warm climates. Caution: Tropical varieties can harbor _OE_ (a parasite) year-round—remove old growth in winter to break the cycle.
How do I know if my transplanted milkweed is thriving?
Healthy signs: New growth within 2–4 weeks, glossy leaves, and monarchs visiting by late spring. Red flags: Yellowing leaves (nutrient deficiency) or stunted growth (poor soil). Adjust care as needed!
Wrapping up and next steps
Transplanting milkweed isn’t just about saving a plant—it’s about nurturing the future of monarch butterflies! 🦋 With the right timing, tools, and care, you can create a thriving habitat that supports these iconic pollinators. Remember, patience and preparation are key, whether you’re moving seedlings or established plants.
Ready to take the next step? Start small—plant a few milkweed varieties in your garden or share your newfound skills with fellow nature lovers. Every transplant helps, and your efforts will ripple through ecosystems for years to come. Happy gardening! 🌱