Pruning
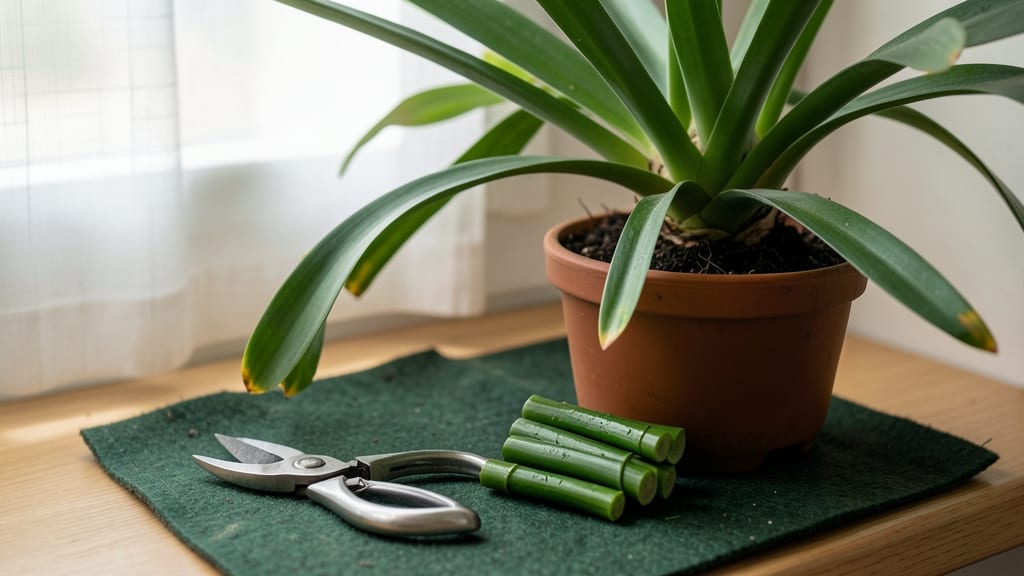
Pruning amaryllis plants might seem intimidating, but it’s the secret to keeping them blooming year after year. 🌱 I’ve learned that cutting back at the right times—right after flowering, mid-summer, and late fall—transforms a struggling plant into a showstopper with bold, healthy growth.
The key is patience and precision, not aggressive trimming.
You’ll only need three basic tools: sharp pruning shears, a clean cutting board, and rubbing alcohol for sterilizing. Timing matters most—never cut back foliage until it yellows naturally, and avoid pruning during dormancy. My first mistake? Trimming too early and ending up with weak stems that couldn’t support blooms.
After pruning, your amaryllis will reward you with stronger foliage and bigger blooms next season. The foliage acts like a food factory, storing energy for future flowers, so never remove it completely.
With just a few cuts at the right moments, you’ll see vibrant green leaves and dramatic flower spikes that turn heads.
This method works for both indoor and outdoor amaryllis, whether you’re dealing with a single pot or a collection. The same principles apply—just adjust for your climate’s growing season. Ready to give your plant a second chance at stunning blooms?
📚 In This Guide
- What you need
- Instructions
- Tips and common mistakes
- Wrapping up and next steps
What you need
- ● Sharp pruning shears – Bypass pruners (4-6 inch blades) for clean cuts; sterilize with rubbing alcohol before use.
- ● Clean, sharp scissors – For trimming individual blooms or leaves (avoid dull tools—they crush stems!).
- ● Rubbing alcohol (70% isopropyl) – 1 small bottle to disinfect tools between cuts and prevent disease.
- ● Glove – 1 pair of gardening gloves (nitrile or cotton) to protect hands from sap and thorns.
- ● Newspaper or cardboard – 2-3 sheets to lay under the plant and catch debris.
- ○ Rooting hormone – Optional for propagating cuttings (e.g., Clonex or Rootone).
- ● Small pot or container – If repotting or dividing bulbs, use a pot 1-2 inches larger than the bulb.
- ● Cinnamon powder – A pinch to dust cuts and prevent rot (natural antifungal!).
- ● Plant food – Balanced fertilizer (e.g., 10-10-10) for post-pruning recovery (mix 1 tsp per gallon of water).
- ● Spray bottle with water – To mist leaves after trimming (helps reduce stress).
Step-by-Step instructions for pruning amaryllis plants
Here's the straightforward approach I use every season to keep my amaryllis thriving.
✂️ Step 1: Post-Bloom Pruning After Flowers Fade
Once your amaryllis blooms fade completely and the flower stalk turns yellow or brown, it's time to prune. Use clean, sharp pruning shears to cut the stalk about 1 inch above the bulb. This redirects the plant's energy back into the bulb, strengthening it for next year's growth.
Don't remove the leaves just yet—those are hard at work storing energy. I always wait until the stalk is fully dead and crispy before cutting. If you prune too early, the plant may waste energy trying to revive the dying stalk instead of storing nutrients.
🌿 Step 2: Mid-Season Leaf Maintenance in Summer
During the summer growing season, check your amaryllis leaves every 2-3 weeks. Remove any yellow or brown leaves at the base using your shears, cutting just above a healthy leaf node. This prevents disease and keeps the plant focused on new growth.
If a leaf becomes too long or flops over, you can trim it back by about one-third to encourage bushier growth. Just avoid cutting into the bulb itself—amaryllis bulbs are sensitive to damage, and cuts can invite rot. I usually do this trimming in early summer when the plant is actively growing.
⏰ Step 3: Fall Dormancy Prep and Leaf Removal
When your amaryllis enters dormancy in late fall, the leaves will naturally yellow and die back. Once about half the leaves have turned brown, it's time to trim the remaining foliage. Cut the leaves back to about 2 inches above the bulb, leaving just a small stub.
This step is crucial for forcing dormancy. The plant needs to rest, and removing the leaves helps it conserve energy. Water sparingly during this time—just enough to keep the soil slightly moist, but not enough to encourage new growth. I usually stop watering entirely once all the leaves are brown and crispy.
🌱 Step 4: Springtime Bulb Inspection and Adjustments
In early spring, before you repot or fertilize, inspect the bulb for any signs of damage or rot. Use your shears to trim away any dead or shriveled sections, cutting just above the healthy bulb tissue. This is also a good time to divide any offsets if your bulb has produced baby bulbs.
If you notice any soft or mushy spots on the bulb, that's a sign of rot. Trim those areas away immediately, and consider treating the bulb with a fungicide if the rot is extensive. Healthy bulbs should feel firm and papery—like an onion skin. Once you've cleaned up the bulb, it's ready for repotting and the next growing cycle.
Tips & tricks for perfect amaryllis pruning
These simple tricks will help you keep your amaryllis healthy and blooming beautifully year after year.
Timing Tip: The key to successful pruning is patience—especially in Step 1 when waiting for the flower stalk to turn completely yellow and crispy. I've learned the hard way that cutting too soon can stress the plant. Look for the stalk to feel dry and brittle before pruning. This ensures the plant redirects all its energy to the bulb rather than wasting it trying to revive a dying stalk.
Tool Tip: Always use clean, sharp pruning shears for every cut. I sterilize my shears with rubbing alcohol between plants to prevent spreading disease. Dull blades can crush plant tissue, making clean cuts that heal properly. For Step 2's regular maintenance, I keep a small pair of shears by my plant pot for quick trims every 2-3 weeks.
Visual Cue: When you reach Step 3 and need to determine when to trim fall leaves, look for about half the leaves to be brown while the other half remains green. This natural progression signals the plant's dormancy cycle. Cutting too early can disrupt this process, while waiting too long may leave the plant vulnerable to pests in the remaining foliage.
Spring Inspection: In Step 4, healthy bulb tissue should feel firm like an onion skin. If you notice any soft spots during your spring inspection, act immediately to prevent rot from spreading. I've found that treating bulbs with a fungicide at this stage can save even heavily damaged bulbs, giving them a second chance for next season's blooms.
Pro Tips for Pruning Amaryllis Plant
- These simple tricks will help you keep your amaryllis healthy and blooming beautifully year after year.
- Timing Tip: The key to successful pruning is patience—especially in Step 1 when waiting for the flower stalk to turn ...
- Tool Tip: Always use clean, sharp pruning shears for every cut. I sterilize my shears with rubbing alcohol between pl...
Frequently asked questions
Got questions about pruning your amaryllis? You’re not alone! Here are answers to the most common concerns—so you can keep your plant thriving and blooming like a pro.
When is the best time to prune amaryllis after blooming?
Prune your amaryllis after the flowers fade but before the foliage turns yellow (usually 4–6 weeks post-bloom). This gives the plant energy to store in its bulb for next year’s growth. Pro tip: Cut stems at a 45° angle, about an inch above the bulb, to prevent rot.
Should I cut the leaves off amaryllis completely?
No! Never remove all the leaves—even after blooming, they photosynthesize and feed the bulb. Trim only the dead or brown leaves, leaving about 6–8 inches of healthy green foliage. This ensures your bulb stays strong for future blooms.
Can I prune amaryllis in winter?
Winter is not the ideal time for pruning unless you’re dealing with yellow or mushy leaves (a sign of rot or dormancy). If your plant is dormant (no leaves, dry soil), wait until spring to trim. Otherwise, prune only when you spot damage—never during active growth.
What if my amaryllis doesn’t bloom after pruning?
Lack of blooms often means the bulb isn’t getting enough light or nutrients. Check these fixes:
- Light: Move to a bright, indirect spot (south-facing window).
- Water: Soak the bulb in water for 12 hours weekly during dormancy.
- Fertilizer: Use a balanced bulb fertilizer in spring.
Can I propagate amaryllis from cuttings?
Yes! After pruning, you can root leaf cuttings in water or soil. Here’s how:
- Cut a healthy leaf into 2–3 inch segments (below a node).
- Place in water or moist perlite until roots form (4–6 weeks).
- Transplant to soil once roots are 1–2 inches long.
Wrapping up and next steps
Pruning your amaryllis isn’t just about tidying up—it’s the secret to longer blooms, healthier foliage, and a thriving plant! 🌱 By following seasonal trims (late winter, post-bloom, and early fall), you’ll encourage new growth and keep pests at bay.
Remember, confidence comes with practice, so don’t hesitate to experiment with your timing and technique.
Ready to take the next step? Grab your shears and give your amaryllis the TLC it deserves! Then, explore fertilizing tips to supercharge those stunning blooms for next season. Happy pruning! ✂️💫