How To
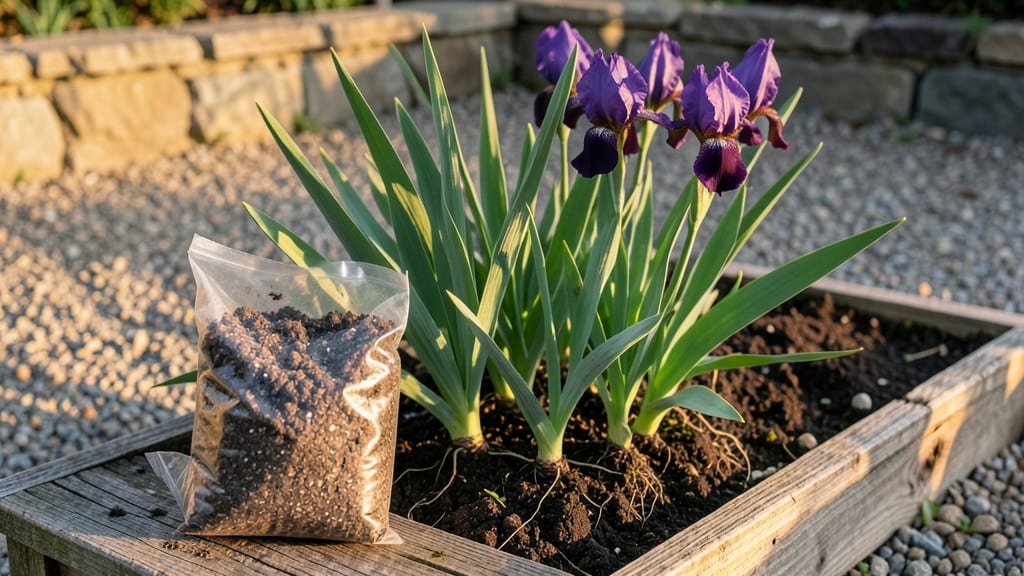
Planting iris tubers transforms your garden into a season-long splash of color—deep purples, sunny yellows, and everything in between. 🌸 I’ve planted these rhizomes for years, and the key to their dramatic blooms lies in how you prep the soil, position them just right, and time the planting.
Most gardeners overlook drainage, which is where iris plants either thrive or rot.
The process starts with well-draining soil and a sunny spot—iris tubers need at least 6 hours of direct sun daily. You’ll want a slightly raised bed if your soil stays soggy, and a shovel to create trenches about 4 inches deep.
Planting in early fall or late winter gives roots time to establish before the heat arrives, and spacing them 12-24 inches apart ensures each gets room to grow.
By late spring, you’ll see sword-like foliage emerge, followed by bold, layered blooms that last for weeks. The secret to keeping them coming back? Avoid overwatering—they hate wet feet—and divide clumps every 3-4 years to prevent overcrowding. Once established, they’re nearly maintenance-free and spread like a living carpet of color.
Perfect for borders, cottage gardens, or even container plantings in well-draining mixes. Here’s how to get those tubers in the ground for a showstopping display every year—no guesswork, just results.
📚 In This Guide
- What you need
- Instructions
- Tips and common mistakes
- Wrapping up and next steps
What you need
- ● Iris tubers: Healthy, firm rhizomes (tubers) with at least one eye (growth point). Choose based on your climate zone and preferred color.
- ● Well-draining soil: A mix of native soil, compost, and coarse sand or perlite (ratio: 2:1:1). Aim for 6.0–7.0 pH.
- ● Garden fork or tiller: For loosening soil to a depth of 8–12 inches.
- ● Garden gloves: To protect hands while handling rhizomes and soil.
- ● Sharp knife or pruners: For trimming old foliage and rotten roots before planting.
- ○ Mulch (optional but recommended): Pine straw, bark, or gravel (2–3 inches) to retain moisture and suppress weeds.
- ● Measuring tape or ruler: To space tubers 12–24 inches apart (depending on variety).
- ● Watering can or hose with a gentle spray nozzle: For deep but even watering after planting.
- ● Fertilizer (low-nitrogen, high-phosphorus): Such as 5-10-10 or bone meal (1–2 tbsp per tuber).
- ● Stakes or labels: To mark newly planted tubers (especially useful for large gardens!).
- ● Soil pH test kit: To verify soil acidity before planting (adjust with lime or sulfur if needed).
- ○ Sunlight meter (optional): To confirm your planting spot gets full sun (6+ hours/day).
Step-by-Step guide to planting iris tubers
Here's how to create a dramatic, long-blooming display using the classic layered planting method.
🌱 Step 1: Prepare the Planting Site
Choose a location with full sun exposure (6+ hours daily) and well-draining soil—iris tubers rot quickly in soggy conditions. Loosen the soil to a depth of 12 inches using a garden fork, breaking up any compacted layers. If your soil is heavy clay, mix in 2-3 inches of coarse sand or perlite to improve drainage.
Test the soil pH—iris thrives in neutral to slightly alkaline soil (6.5-7.5). If your soil is acidic, amend with crushed limestone following package instructions. I like to work in a 2-inch layer of compost at the bottom of the planting hole to provide nutrients without compacting the roots.
🪴 Step 2: Arrange Tubers by Size and Age
Sort your iris tubers by size, placing the largest, oldest ones at the bottom of the hole (they'll produce the strongest blooms). Smaller tubers go above them, creating a natural tiered effect. Space each tuber 6-12 inches apart, depending on variety—bearded irises need more room than dwarf types.
Position tubers with the flat side down and the pointy end up. This ensures the fan of roots (rhizomes) sits horizontally, which is critical for proper growth. If you're planting multiple rows, stagger tubers to create a fuller, more natural look.
💧 Step 3: Plant at the Correct Depth
Cover the largest tubers with 2 inches of soil, then add progressively less soil for smaller tubers above them. The top of the largest tuber should sit just 1 inch below the soil surface—burying them too deep smothers the rhizomes, while planting too shallow exposes them to rot.
Press the soil gently around each tuber to eliminate air pockets, but don’t compact it. Water thoroughly after planting to settle the soil and encourage root contact. Avoid overwatering—iris tubers need to dry out slightly between waterings to prevent disease.
☀️ Step 4: Mulch and Monitor Early Growth
Apply a 2-inch layer of mulch (like pine straw or shredded bark) around the base of the plants, keeping it 6 inches away from the rhizomes to prevent moisture buildup. Mulch helps regulate soil temperature and reduces weed competition, but never pile it directly against the tubers.
In 4-6 weeks, you’ll see fan-shaped leaves emerge—this is your signal the roots have taken hold. Wait until new growth reaches 4-6 inches tall before fertilizing with a balanced, low-nitrogen formula (10-10-10). Too much nitrogen early on encourages leaf growth at the expense of blooms.
✂️ Step 5: Prune and Divide for Long-Term Health
After blooming, cut back the foliage to half its height once it turns brown, but leave the leaves until they naturally die back in late summer. This stored energy fuels next year’s blooms. Every 3-4 years, dig up the tubers in early summer, divide any that have formed multiple fans, and replant the strongest sections.
Real talk: Iris tubers multiply aggressively. If left undisturbed, they’ll form dense clumps that crowd each other out. Dividing in summer ensures you always have vigorous plants—and extra tubers to share with fellow gardeners.
Tips & tricks for planting iris tubers
This layered approach transforms ordinary plantings into showstopping displays—here's how to avoid common pitfalls and maximize bloom potential.
Soil Preparation Secret: In Step 1, when loosening soil to 12 inches, focus on breaking up the bottom layer where roots will spread. I use a garden fork to create vertical channels that improve drainage—this prevents the dreaded rot that kills iris tubers. For clay-heavy soils, mix in that 2-3 inches of coarse sand or perlite right into the bottom third of the planting hole, not just the surface. Think of it as creating a drainage highway for those rhizomes.
Layering Strategy: The tiered arrangement in Step 2 isn't just decorative—it's a bloom timing hack. Larger tubers at the bottom produce the earliest, most robust blooms, while smaller ones above extend your season. Pro tip: For maximum impact, plant the largest tubers in the center of your bed, then work outward with progressively smaller ones. This creates a natural bloom progression from center outward, like a floral waterfall.
Depth Precision: That 1-inch depth for the largest tuber's top in Step 3 is non-negotiable. Too deep and you smother growth; too shallow and they bake in summer heat. Here's my trick: Use a ruler to measure from the soil surface down to the tuber's top—this visual cue prevents guesswork. For the 2-inch soil covering, I like to use a small shovel to create a gentle slope rather than a flat layer, which helps water run off during heavy rains.
Post-Planting Care: After planting, I recommend a light watering—just enough to settle the soil—then let nature take over. Iris tubers need that drying period between waterings to develop strong roots. In Step 4, when applying mulch, use a rake to create a slight depression around each plant, keeping that 6-inch clearance. This prevents water from pooling directly against the rhizomes while still protecting them from temperature swings.
Pro Tips for Planting Iris Tubers
- This layered approach transforms ordinary plantings into showstopping displays—here's how to avoid common pitfalls an...
- Soil Preparation Secret: In Step 1, when loosening soil to 12 inches, focus on breaking up the bottom layer where roo...
- Layering Strategy: The tiered arrangement in Step 2 isn't just decorative—it's a bloom timing hack. Larger tubers at ...
Frequently asked questions
Got questions about planting iris tubers? You’re not alone—these beauties can be tricky if you’re new to them! Here are answers to the most common queries to help you grow stunning irises with confidence.
When is the best time to plant iris tubers?
Plant iris tubers in early fall (8–10 weeks before the ground freezes) or late winter/early spring (as soon as the soil is workable). Fall planting gives roots time to establish before winter, while spring planting works in warmer climates. Avoid planting in extreme heat or frost.
How deep and how far apart should I plant iris tubers?
Dig a hole 4–6 inches deep (rhizomes should sit half-buried) and space tubers 12–24 inches apart (closer for dwarf varieties, wider for larger types). Add a handful of bone meal or compost to the hole for extra nutrients. Overcrowding can lead to weak blooms!
What if my iris tubers rot or get mushy after planting?
Mushy tubers usually mean overwatering or poor drainage. Ensure the soil is well-draining (sandy loam works best) and avoid soggy spots. If you’ve already planted, lift the tubers, trim any soft spots, let them dry in shade for a day, then replant. Fungicide can also help prevent rot.
Can I plant iris tubers in containers instead of the ground?
Yes! Use a wide, shallow container with drainage holes and a mix of potting soil + perlite. Plant rhizomes horizontally with the top half exposed. Containers dry out faster, so water lightly but regularly. Just avoid deep pots—they trap moisture and risk rot.
How long does it take for iris tubers to bloom after planting?
Patience pays off! Established iris tubers typically bloom 2–3 years after planting, but some may surprise you with flowers in the first year if planted in early fall. Healthy tubers (with firm, plump rhizomes) bloom more reliably. Deadhead spent blooms to encourage stronger growth next season.
Still stumped? Drop your iris-planting woes in the comments—we’re happy to help!
Wrapping up and next steps
Planting iris tubers is your ticket to stunning, long-lasting blooms that bring color and life to your garden.
By following the right steps—choosing healthy rhizomes, preparing the soil, and spacing them correctly—you’ll create a vibrant display that thrives season after season. Don’t wait for inspiration; grab those tubers and get planting!
Ready to dive in? Start by gathering your supplies (like gloves, a trowel, and compost) and pick a sunny spot in your garden. Then, follow the step-by-step guide to transform your outdoor space into a breathtaking iris paradise. Your future blooms will thank you! 🌸