Propagation
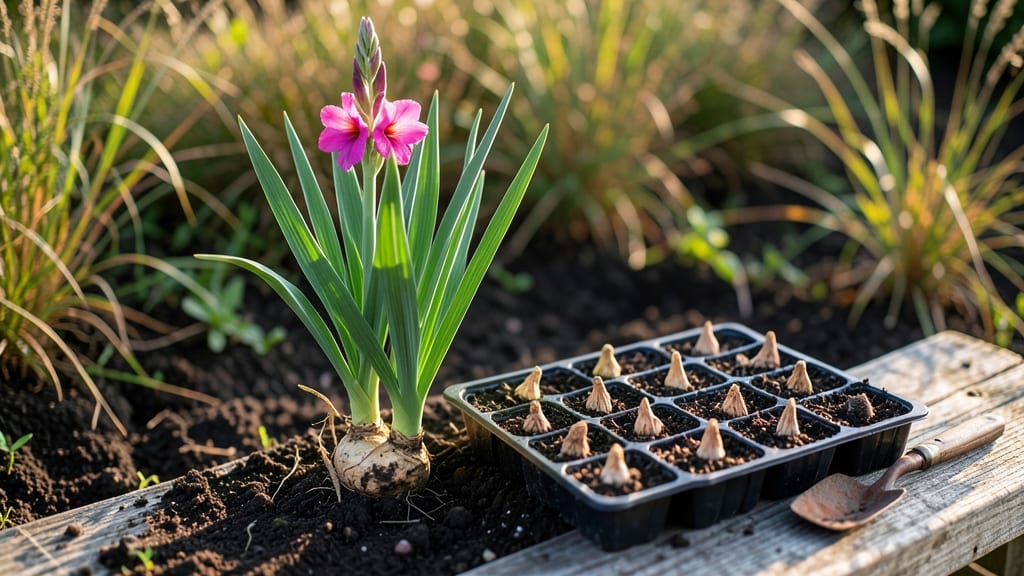
Planting gladiolus seeds unlocks a garden showstopper you won’t find in nurseries—tall, drama-packed blooms that last from summer through fall. 🌸 I’ve grown them from seed for years, and the difference between store-bought corms and homegrown stalks is night and day.
These aren’t your grandmother’s cut flowers; they’re bold, architectural, and perfect for cutting or standing tall in the garden.
The secret starts with patience—gladiolus seeds take 10-12 weeks to mature enough to bloom, but the payoff is worth it. You’ll need well-draining soil, full sun, and a warm spot to start them indoors in early spring.
Most beginners rush the timing or skimp on sunlight, which leads to leggy, weak plants. I learned that the hard way after my first batch flopped in shady conditions.
By summer, you’ll be harvesting 2-3 foot spikes of vibrant blooms in colors from deep purple to fiery orange. The flowers open sequentially up the stalk, giving you weeks of fresh-cut beauty. Plus, they’re deer-resistant and attract pollinators—basically a no-fuss, high-impact plant once you get the basics right.
Works in zones 7-10, though you can extend the season in cooler climates with row covers. Here’s how to avoid the three mistakes that kill most first-time growers—and keep your glads thriving year after year.
📚 In This Guide
- What you need
- Instructions
- Tips and common mistakes
- Wrapping up and next steps
What you need
- ● Gladiolus seeds: Choose fresh, high-quality seeds (preferably hybrid varieties for vibrant blooms). Buy from a trusted supplier for best results.
- ● Seed-starting trays or pots: 2–3 inch deep containers (biodegradable or plastic) with drainage holes. Quantity: 1 tray or 6–12 small pots per batch.
- ● Seed-starting mix: Lightweight, well-draining potting soil (avoid garden soil—it’s too dense!). Recommended: Cactus/succulent mix or a 50/50 blend of peat moss and perlite.
- ● Grow lights or sunny windowsill: Gladiolus seeds need bright light (6–8 hours/day) to germinate. A LED grow light works if natural light is limited.
- ● Spray bottle: For gentle watering to keep seeds moist without disturbing them.
- ○ Heat mat (optional but helpful): Maintains soil temps at 70–75°F (21–24°C) for faster germination.
- ● Small hand trowel or spoon: For planting seeds without crushing them.
- ● Plastic wrap or humidity dome: Keeps moisture locked in until germination (remove once sprouts appear!).
- ● Fertilizer (balanced, water-soluble): Dilute to half-strength once seedlings have 2–3 true leaves (e.g., 10-10-10 or 20-20-20).
- ● Transplanting tools: Small pots (3–4 inches) or garden bed prepared with compost-rich soil for moving seedlings outdoors.
- ○ Stakes or cages (optional): Tall gladiolus stalks need support—bamboo stakes or tomato cages work well.
- ● Timing: Start seeds indoors 8–10 weeks before your last frost date (gladiolus are frost-sensitive!).
- ● Warmth: Ideal germination temp is 70–75°F (21–24°C). If your home is cooler, use a heat mat.
- ● Patience: Germination can take 2–4 weeks—stay consistent with moisture and light!
- ● Outdoor prep: Wait until soil temps reach 60°F (15°C) and nighttime temps stay above 50°F (10°C) before transplanting.
Step-by-Step instructions for planting gladiolus seeds
Here's how to grow these showstopping blooms from seed—no rushing, just patience and perfect timing.
🌱 Step 1: Start Seeds Indoors for Early Growth
Gladiolus seeds need warmth to germinate, so begin indoors 8-10 weeks before your last frost date. Fill 4-inch pots with the seed-starting mix (not garden soil—it’s too dense) and moisten it until damp but not soggy. Press the soil down lightly so it’s firm but not packed.
Plant 2-3 seeds per pot at a depth of ½ inch, about twice the seed’s width. Cover them with a thin layer of additional mix and mist gently with water until the surface looks evenly moist. Place the pots in a seedling heat mat set to 75-80°F—this mimics their natural tropical environment and speeds up germination.
Keep the pots in a bright, warm spot (like a south-facing windowsill) but avoid direct sunlight until sprouts appear. You’ll see the first tiny green shoots in 10-20 days, though some stubborn seeds may take up to 30 days. Once they sprout, remove the heat mat and move them under grow lights for 14-16 hours daily to prevent leggy growth.
☀️ Step 2: Harden Off Seedlings Before Transplanting
About 2 weeks before your last frost, start hardening off the seedlings by placing them outside in a sheltered, shaded spot for 1-2 hours the first day. Gradually increase their outdoor time by 1 hour daily until they can tolerate a full day outside. This toughens their stems and leaves so they won’t wilt when moved to the garden.
Watch for wilting or yellowing leaves—this is a sign they’re not ready yet. If you see this, bring them back inside and extend their outdoor time more slowly. Once they’re hardened off, their leaves should stay firm and green, even after a full day in the sun.
Choose a sunny, well-draining spot in your garden with full sun (6+ hours daily). Gladiolus loves heat and thrives in USDA Zones 5-10, but they’ll need winter protection in colder climates. Amend the soil with 2 inches of compost to improve drainage—these bulbs rot quickly in soggy soil.
🪴 Step 3: Plant Seedlings in the Garden
Dig holes 6 inches deep and 6 inches apart—gladiolus needs space to grow those bold stalks without crowding. Gently remove the seedlings from their pots, keeping the root ball intact, and place them in the holes so the top of the corm is just below the soil surface. Fill in around the roots with soil and firm it lightly.
Water deeply right after planting to settle the soil and encourage root growth. Keep the soil evenly moist but not waterlogged for the first 2 weeks—this helps the roots establish before the heat of summer arrives. You’ll know they’re settling in when you see new leaves unfurling from the base of the plant.
Apply a balanced fertilizer (10-10-10) at planting and again when the stalks reach 12 inches tall. This gives them the nutrients they need for strong growth and season-long blooms. Mulch around the base with 2 inches of straw to retain moisture and keep weeds at bay.
✂️ Step 4: Support Stalks and Deadhead for Longer Blooms
As the stalks grow, they’ll need sturdy support—insert 6-foot stakes or a tall trellis into the soil beside each plant when they reach 12 inches tall. Tie the stalks loosely to the support with soft plant ties to prevent them from snapping in wind or rain.
Once the first blooms open, deadhead spent flowers by snipping off the faded blossoms just above the next set of buds. This redirects the plant’s energy into producing more flowers instead of setting seed. You’ll see new buds forming within a week—this is your reward for the effort!
Continue watering 1 inch per week, especially during dry spells, and fertilize again mid-summer with a low-nitrogen, high-phosphorus fertilizer (5-10-10) to encourage more blooms. By late fall, the foliage will yellow and die back—this is normal. Cut the stalks back to 2 inches tall and leave the corms in the ground for winter.
Tips & tricks for perfect gladiolus seed planting
These insider tips will help you avoid common pitfalls and grow those dramatic gladiolus blooms like a pro.
The Heat Factor: That 75-80°F heat mat is non-negotiable for germination—gladiolus seeds are tropical and need consistent warmth. I've seen seeds take 30 days to sprout when kept at room temperature (68°F) instead of the proper heat. If you don't have a heat mat, place the pots on top of your refrigerator (where it's warmest) or use a seedling heating pad. The key is maintaining that tropical warmth until sprouts appear.
Timing Secret: The 8-10 week indoor start time might seem long, but it's crucial for establishing strong seedlings before transplanting. I learned this the hard way by starting too late—my seedlings struggled to catch up in the garden. Mark your last frost date on the calendar and work backward from there. For northern climates, you might need to start even earlier (up to 12 weeks). The extra time gives your plants the head start they need to produce those bold stalks.
Lighting Strategy: Those 14-16 hours of grow lights are essential for preventing leggy seedlings. I use a simple LED grow light on a timer to automate this—no need for fancy equipment. Position the light just 4-6 inches above the seedlings to prevent burning. If you notice them stretching toward the light, lower it slightly. The goal is to create compact, sturdy plants that won't flop when you transplant them.
Transplanting Prep: When hardening off seedlings in Step 2, pay attention to the weather forecast. If rain is predicted, delay your outdoor time to avoid soggy soil. I also recommend hardening off during the cooler parts of the day (morning or evening) when temperatures are more moderate. This gradual process prevents shock—your seedlings should never look stressed during this transition period.
Pro Tips for Gladiolus Seeds Planting
- These insider tips will help you avoid common pitfalls and grow those dramatic gladiolus blooms like a pro.
- The Heat Factor: That 75-80°F heat mat is non-negotiable for germination—gladiolus seeds are tropical and need consis...
- Timing Secret: The 8-10 week indoor start time might seem long, but it's crucial for establishing strong seedlings be...
Frequently asked questions
Got questions about growing gladiolus from seeds? You’re not alone! Here are some of the most common queries—and their straightforward answers—to help you get started with confidence.
When is the best time to plant gladiolus seeds?
Gladiolus seeds thrive in warm soil (at least 60°F/15°C). Plant them 4–6 weeks before your last frost date in spring, or in late summer (August–September) for fall blooms. In warmer climates, you can even plant in early spring for a summer display. Patience is key—seeds may take 8–12 weeks to sprout!
How long does it take for gladiolus seeds to germinate?
Germination time varies, but expect 2–4 weeks under ideal conditions (warmth, moisture, and indirect light). If you don’t see sprouts in 6 weeks, gently check the seed’s viability by soaking it in water—if it sinks, it’s still good! Pro tip: Keep soil consistently moist (not soggy) to speed up the process.
Can I grow gladiolus from seeds indoors before transplanting?
Start seeds 6–8 weeks before the last frost in small pots with well-draining soil. Use a grow light or sunny windowsill (south-facing) to prevent leggy seedlings. Once seedlings have 3–4 true leaves and soil warms, transplant them 12 inches apart outdoors. Bonus: This method extends your growing season in cooler climates!
Why aren’t my gladiolus seeds sprouting? Troubleshooting tips.
If seeds refuse to sprout, check these common culprits:
- Cold soil: Gladiolus seeds need warmth—wait until soil is at least 60°F (15°C).
- Poor soil: Amend with compost for better drainage and nutrients.
- Overwatering: Seeds rot in soggy soil. Water lightly to keep soil damp, not wet.
- Old seeds: Viability drops after 1–2 years. Test with the water float trick!
Still stuck? Try scarifying seeds (lightly nicking the outer shell) to break dormancy.
Are gladiolus seeds worth it compared to bulbs?
Yes—but with a caveat! Seeds produce smaller, later-blooming flowers (first year may yield just foliage), while bulbs give immediate, showy blooms. If you love experimenting or want unique hybrids, seeds are a fun (and budget-friendly) choice. For instant impact, combine both: plant bulbs for this year’s color and seeds for next year’s surprises!
Wrapping up and next steps
Growing gladiolus from seeds is a rewarding journey that brings vibrant blooms and bold beauty to your garden. With the right soil, timing, and care, you’ll enjoy season-long color and even share your success with fellow gardeners.
Now that you’re armed with tips, don’t wait—grab those seeds and plant with confidence!
🌱 Next Steps:
- Start small—try a few seeds in pots before committing to a full bed.
- Document your progress with photos to track growth and learn for next season.
- Share your gladiolus blooms on social media using #GladiolusGarden for inspiration!