Picking
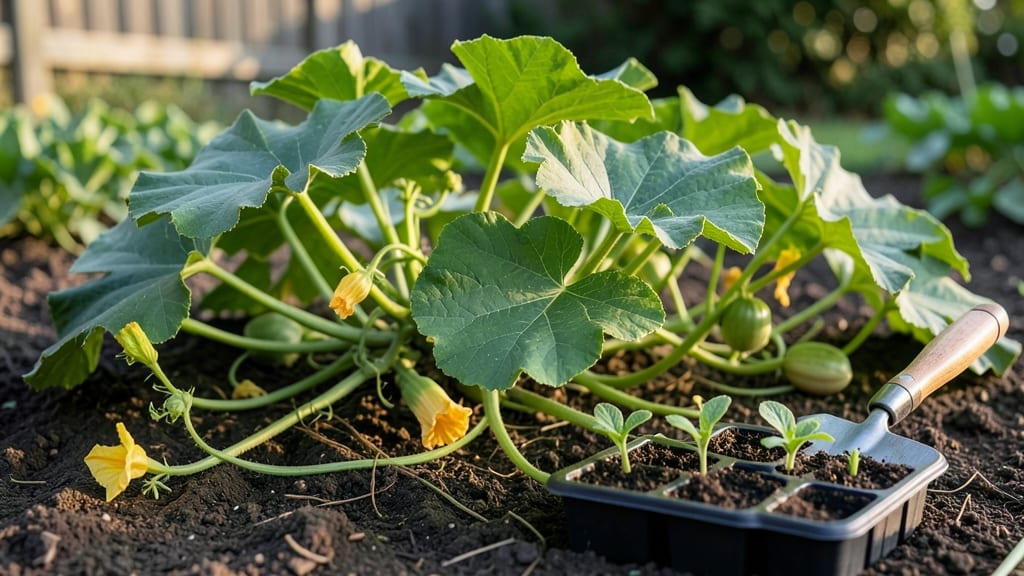
Planting Hubbard squash in well-drained soil gives you those iconic, ribbed fruits that taste sweeter than store-bought. I learned the hard way that soggy soil leads to rot—so I’ll show you how to get it right from the start, whether you’re starting from seed or transplanting.
The key is timing, spacing, and a little extra care during those first few weeks when vines are still fragile.
You’ll need a sunny spot with at least 6 hours of direct light daily, loose soil mixed with compost, and a 3-foot diameter circle per plant to give those sprawling vines room to stretch. If you’re planting seeds, wait until soil temperatures hit 60°F—cold soil means slow germination.
For seedlings, harden them off for 5-7 days before setting them out, or they’ll shock and wilt faster than you can say “squash vine.”
Once planted, keep the soil consistently moist but not soggy—think of it like a well-watered sponge, not a swamp. Mulch around the base to retain moisture and keep weeds at bay, because nothing ruins a Hubbard harvest like competition from crabgrass.
Within 2-3 weeks, you’ll see those first tendrils reaching out, and by midsummer, you’ll have a lush, productive vine ready to feed your family.
This method works for both spring and summer planting, though fall crops need extra protection from early frosts. The real secret? Patience—Hubbard squash takes 90-110 days to mature, but the wait is worth it for those flavorful, nutty fruits that keep well for weeks.
Let’s get those seeds in the ground!
📚 In This Guide
- What you need
- Instructions
- Tips and common mistakes
- Wrapping up and next steps
What you need
- ● Hubbard squash seeds (10–15 seeds per plant; 3–5 plants recommended for a family harvest). Choose heirloom or hybrid varieties like ‘Blue Hubbard’ or ‘Long Island Cheese’.
- ● Well-draining soil (pH 6.0–6.8). Amend with compost (2–3 inches mixed into top 6–12 inches of soil) for nutrients.
- ● Sunlight: Full sun (6–8+ hours daily). Partial shade may reduce yields.
- ● Watering supplies: Drip irrigation or soaker hose (to keep soil consistently moist but not waterlogged).
- ● Fertilizer: Balanced fertilizer (10-10-10) at planting (1 tbsp per plant).
- ● Low-nitrogen fertilizer (5-10-10) when vines start flowering (1 tbsp per plant).
- ● Mulch: Straw or shredded leaves (2–3 inches) to retain moisture and suppress weeds.
- ● Garden trowel or transplanting spade (for digging holes or transplanting seedlings).
- ○ Garden twine or stakes (optional: to support heavy vines if needed).
- ● Row covers or frost cloth (for early planting in cool climates).
- ● Pruning shears (to remove yellow leaves or excess vines for better airflow).
- ● Harvest knife or pruners (for clean cuts when squash reach maturity).
- ○ Soil test kit (optional but helpful to check nutrient levels before planting).
Instructions for planting Hubbard squash like a Pro
Ready to grow those prized, ribbed squash? Here’s how to set up your plants for a bountiful harvest.
Choose the Right Location and Prepare the Soil
Hubbard squash thrives in full sun, so pick a spot that gets at least 6-8 hours of direct sunlight daily. These vines spread wide—give them 50-100 square feet per plant to sprawl comfortably. Avoid planting where winter squash or pumpkins grew last year to prevent soil-borne diseases.
Loosen the soil to a depth of 12 inches with a garden fork or tiller. Hubbard squash prefers well-draining, fertile soil with a pH between 6.0 and 7.0. Work in 2-3 inches of compost or aged manure to enrich the soil before planting. If your soil is heavy clay, mix in a 1-inch layer of coarse sand to improve drainage.
Plant Seeds at the Correct Depth and Spacing
Hubbard squash seeds germinate best in warm soil (70-90°F). Plant seeds 1 inch deep after the last frost when the soil temperature consistently stays above 60°F. Space seeds 2-3 feet apart in hills, with 3-4 seeds per hill. Hills help improve drainage and make harvesting easier later.
If you’re planting multiple hills, space them 5-6 feet apart to allow for proper airflow and reduce disease risk. Water the soil lightly before planting to help seeds settle into place. Cover the seeds with ½ inch of soil and gently pat it down—don’t press too hard, or the seeds may struggle to break through.
Provide Consistent Water and Mulch for Strong Growth
Water newly planted seeds 1 inch per week, keeping the soil evenly moist but not soggy. Hubbard squash has shallow roots, so drip irrigation or soaker hoses work best to deliver water directly to the base without wetting the leaves. Once seedlings emerge, thin them to 1-2 strong plants per hill, cutting weaker stems at the base with scissors.
Apply a 2-3 inch layer of straw or wood chips around the base of the plants to retain moisture and suppress weeds. Mulch also keeps the soil temperature stable, which encourages steady vine growth. Avoid piling mulch directly against the stems—leave a 2-inch gap to prevent rot.
Fertilize and Monitor for Pests
When vines start spreading and leaves appear, apply a balanced fertilizer (10-10-10) at half strength to encourage healthy foliage and fruit development. Side-dress with additional compost every 4-6 weeks during the growing season. Hubbard squash is heavy feeders, so don’t skimp on nutrients—you’ll see bigger, sweeter squash as a result.
Watch for cucumber beetles and squash bugs, which love to munch on Hubbard squash leaves. Handpick pests in the morning when they’re sluggish, or use row covers early in the season to protect young plants. If you notice yellowing leaves or stunted growth, check the undersides of leaves for eggs or adult pests—act fast to prevent an infestation.
Harvest at Peak Ripeness for Best Flavor
Hubbard squash is ready to harvest when the skin turns hard and dull, usually 85-100 days after planting. Gently twist the squash at the stem—it should separate cleanly without resistance. Use a pruning saw for larger squash to avoid damaging the vines. Handle harvested squash carefully to prevent bruising, which shortens storage life.
Cure squash by placing them in a warm (80-85°F), dry, well-ventilated space for 10 days to harden the skin further. Store cured squash in a cool (50-55°F), dark place where they’ll keep for 2-3 months. The longer they cure, the sweeter and more flavorful they’ll be—worth the wait!
Tips & tricks for planting Hubbard squash like a Pro
A few key strategies will help you grow the largest, healthiest Hubbard squash possible. I’ve learned these through trial and error—don’t make the same mistakes I did!
Soil Temperature is Everything: Hubbard squash seeds need soil that’s consistently above 60°F to germinate properly. If your spring is cool, consider using a black plastic mulch to warm the soil faster. I’ve seen germination rates drop dramatically when seeds are planted in cooler soil—wait for that 60°F threshold before getting excited to plant. The 70-90°F range is ideal for fastest germination, so check your soil temperature with a thermometer if you’re unsure.
Hill Planting Pays Off: The hill planting method in Step 2 isn’t just about aesthetics—it actually improves drainage and makes harvesting easier. For even better results, create hills that are slightly taller than the ½-inch soil coverage mentioned. Build mounds about 6 inches high before planting, then cover with the recommended ½ inch. This elevated position helps prevent waterlogging and gives the vines more room to spread.
Mulch Like a Pro: That 2-3 inch layer of straw or wood chips isn’t just for looks—it’s a game-changer. The mulch helps maintain consistent soil moisture while keeping temperatures stable, which is especially important during those hot summer afternoons. I’ve noticed my plants handle drought better when properly mulched, and the weed suppression means less competition for nutrients. Just remember to keep that 2-inch gap around the stems to prevent rot.
Harvest Timing Secrets: The 85-100 day window is your target, but don’t rely solely on days—watch for that hard, dull skin instead. I’ve found that squash left on the vine too long can become tough and seedy. For the sweetest flavor, aim to harvest when the skin is firm but still slightly soft to the touch. The longer curing period at 80-85°F really makes a difference in flavor development—don’t skip this step if you want restaurant-quality squash!
Pro Tips for Planting Hubbard Squash
- A few key strategies will help you grow the largest, healthiest Hubbard squash possible. I’ve learned these through t...
- Soil Temperature is Everything: Hubbard squash seeds need soil that’s consistently above 60°F to germinate properly. ...
- Hill Planting Pays Off: The hill planting method in Step 2 isn’t just about aesthetics—it actually improves drainage ...
Frequently asked questions
When is the best time to plant Hubbard squash?
Hubbard squash thrives in warm soil, so wait until after the last frost when nighttime temps stay above 50°F (10°C). For most climates, this means late spring to early summer (May–June). In warmer zones, you can even start in early spring with row covers.
How long does it take for Hubbard squash to mature?
Hubbard squash has a long growing season—typically 90–120 days from transplanting to harvest. Patience pays off! Start seeds indoors 4–6 weeks before the last frost to give vines enough time to establish.
Can I grow Hubbard squash in containers or small spaces?
Yes! Hubbard squash vines can sprawl 10–15 feet, but they thrive in large containers (at least 5-gallon buckets) or raised beds with trellises. Choose compact varieties like ‘Golden Delicious’ if space is tight. Just ensure full sun (6+ hours/day) and well-draining soil.
What pests or diseases should I watch for?
Common threats include squash bugs, cucumber beetles, and powdery mildew. Use row covers early to deter pests, handpick bugs, and space plants for airflow. For mildew, apply neem oil or copper fungicide preventatively.
What can I plant alongside Hubbard squash for better yields?
Companion planting boosts growth! Try corn, beans, or marigolds to repel pests. Avoid planting near potatoes or pumpkins, as they compete for nutrients. Borage or nasturtiums near vines can also deter squash bugs naturally.
Wrapping up and next steps
Growing Hubbard squash is a rewarding journey that brings hearty, flavorful harvests to your table—and your garden’s beauty! With the right soil, spacing, and care, you’ll enjoy bushy vines and squashes that last well into storage.
Whether you’re a seasoned gardener or just starting, these year-round secrets will help you cultivate success.
Now that you’re armed with the know-how, take the next step: grab your gloves, mark your calendar, and start planting! Watch your garden transform into a Hubbard squash haven—and don’t forget to share your bounty with friends or preserve the harvest for later. Happy growing! 🌱