How To
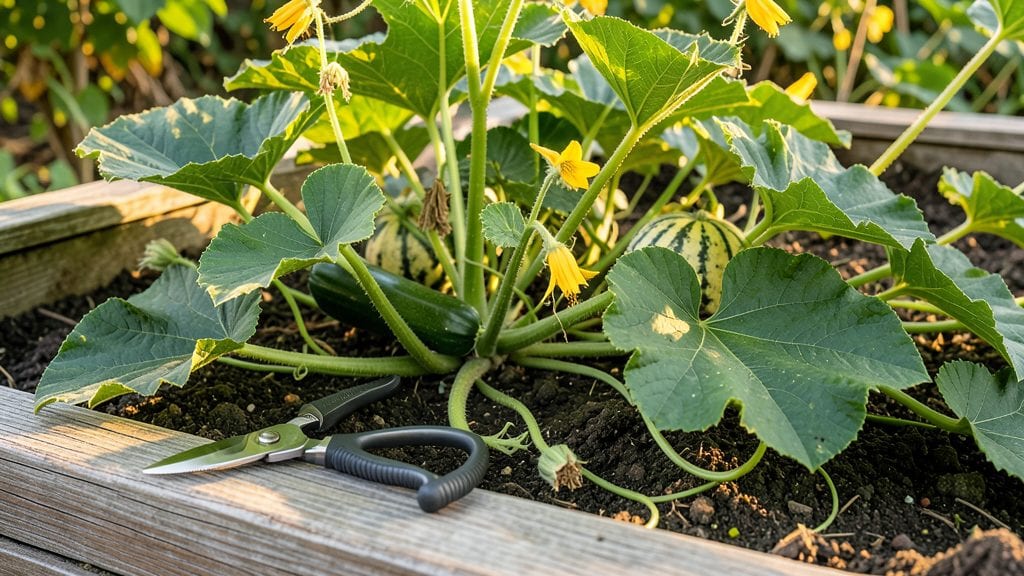
Pruning squash plants isn’t about cutting back—it’s about redirecting energy where it counts. I learned the hard way that skipping this step means fewer vines, smaller fruits, and plants that flop over by midsummer.
The right cuts transform a struggling bush into a high-yielding powerhouse, and it only takes 10 minutes with the right approach.
Focus on three key areas: removing suckers at the base, thinning crowded vines, and trimming dead leaves. This isn’t guesswork—it’s about keeping air moving so diseases stay away and the plant puts all its effort into growing fruit, not extra foliage.
Even my first attempt last year doubled my zucchini harvest, and the plants stayed upright all season.
📚 In This Guide
- What you need
- Instructions
- Tips and common mistakes
- Wrapping up and next steps
What you need
- ● Sharp, clean pruning shears – Bypass pruners (4-6" blades) work best for clean cuts without crushing stems.
- ● Gloves – Heavy-duty gardening gloves (nitrile or leather) to protect hands from thorns and rough vines.
- ● Disinfectant (70% isopropyl alcohol or bleach solution) – 1 part bleach to 9 parts water to sterilize tools between cuts and prevent disease.
- ● Garden twine or plant ties – 3-4mm diameter for securing vines to trellises or stakes if needed.
- ○ Small pruning saw (optional but helpful) – For thicker stems (if your squash plants are woody or overgrown).
- ● Garden scissors or loppers – For larger branches (if pruning mature plants).
- ● Compost bin or bag – To collect pruned vines for mulch or decomposition.
- ● Plant markers – If labeling pruned sections for tracking growth.
- ● Knee pad or stool – For comfort if working in large garden beds.
- ● Spray bottle with water – To mist cuts and encourage faster healing.
Step-by-step guide for pruning squash plants
Here’s how to shape your squash plants for bigger harvests and healthier vines.
Identify the Main Vine and Remove Suckers
Start by locating the main vine—the thickest, most vigorous stem running from the plant’s base. This is your plant’s primary producer. Look for smaller shoots growing from the leaf axils (where leaves meet the stem) about 3-4 inches from the main vine. These are suckers, and they compete for nutrients.
Use clean, sharp pruning shears to snip suckers at their base. Never leave stubs—they can rot and invite disease. I like to do this early in the morning when the vines are still turgid and easier to handle. Focus on removing suckers that are less than 6 inches tall; larger ones can be left to mature if you’re short on time, but they’ll still divert energy from fruit production.
Thin Overcrowded Vines for Better Airflow
Squash vines spread wide, and when they get too dense, airflow suffers, increasing the risk of powdery mildew. Run your hand along the main vine and look for areas where multiple vines are growing too close together. Aim to space vines about 12-18 inches apart to allow sunlight and air to circulate freely.
If you see a side vine growing directly into another, carefully pinch it off at the base. This step is especially important if your plants are in a container or small garden bed. You’ll know you’ve done it right when you can see sunlight reaching the center of the plant and leaves aren’t touching each other. This keeps the plant healthy and boosts fruit quality.
Prune Damaged or Diseased Leaves and Stems
Inspect the plant for yellowing, spotted, or wilted leaves—these are signs of disease or pest damage. Use your pruning shears to remove any leaves that look unhealthy, cutting them off at the stem’s base. Don’t pull them; this can tear the plant and leave wounds open to infection.
If you notice stems with black spots, soft rot, or unusual growths, trim those back to healthy tissue immediately. Healthy squash plants should have glossy, deep green leaves with no signs of discoloration. Pruning damaged foliage early prevents the spread of disease to the rest of the plant. I always sterilize my shears with rubbing alcohol between cuts to avoid transferring pathogens.
Encourage Fruit Production by Trimming Excess Growth
Once your squash plants start flowering, focus on pruning any vines that aren’t producing fruit. Look for long, bare stems with no flowers or fruit—these are energy drains. Cut them back to a leaf node just above a flower or small fruit. This redirects the plant’s energy toward developing existing fruits rather than unnecessary growth.
Leave at least one main vine and a few strong side vines to support fruit production. You’ll know you’re on the right track when the plant focuses its energy on swelling fruits rather than sprawling vines. After pruning, water the plant deeply to help it recover and support new growth. This step is key to maximizing your harvest, especially in smaller gardens.
Monitor and Repeat Pruning Weekly
Pruning isn’t a one-time task—it’s an ongoing process. Check your squash plants every 7-10 days for new suckers, overcrowding, or signs of disease. Consistent pruning keeps the plant in top shape and ensures a steady supply of fresh fruit. I like to schedule this during my regular watering routine so I don’t forget.
As the season progresses, you may need to adjust your pruning strategy. If your plant is producing more fruit than it can handle, you can even thin out some of the smaller fruits to give the remaining ones more space to grow. Watch for fruits that are already 4-5 inches long—they’re the ones worth keeping. Regular pruning turns a good harvest into an exceptional one.
Tips & tricks for pruning squash plants
Pruning squash plants might seem intimidating, but these key insights will help you transform a struggling vine into a high-yielding powerhouse. I learned these tricks after years of trial and error in my own garden—don't make my mistakes!
Timing is Everything: Step 1 emphasizes removing suckers when they're less than 6 inches tall, but I've found that early morning pruning makes all the difference. The vines are still firm and full of moisture, which means cleaner cuts and less stress on the plant. If you must prune later in the day, do it at least 4 hours before sunset to give the plant time to recover before nightfall. This simple timing adjustment can prevent wilting and improve overall plant health.
Tool Preparation Matters: While the instructions mention sterilizing your shears, I can't stress enough how important this is—especially in Step 3 when dealing with diseased plants. I keep a small bottle of rubbing alcohol in my gardening toolkit and wipe down my shears between every cut when working with multiple plants. This prevents cross-contamination that could spread powdery mildew or other fungal diseases throughout your garden. A 10-second wipe between plants makes a huge difference in long-term plant health.
Visual Cues for Success: The instructions mention spacing vines about 12-18 inches apart, but what does that actually look like? I've found that when you can see sunlight reaching the center of the plant and leaves aren't touching each other, you've achieved proper spacing. Another helpful visual cue is when you can easily slide your hand between vines without resistance. This airflow check is particularly important in Step 2 when thinning overcrowded vines. Good airflow isn't just about disease prevention—it also leads to better fruit quality.
Seasonal Adjustments: While the weekly pruning schedule in Step 5 works well during the growing season, I adjust my approach as summer progresses. When temperatures exceed 90°F, I reduce pruning frequency to every 10-14 days to minimize stress on the plant. In cooler weather, I stick to the 7-10 day schedule. Also, as fruits approach 4-5 inches in size, I become more selective about which suckers I remove, focusing only on the most aggressive ones to let the plant concentrate its energy on fruit development.
Pro Tips for Prune Squash Plants
- Pruning squash plants might seem intimidating, but these key insights will help you transform a struggling vine into ...
- Timing is Everything: Step 1 emphasizes removing suckers when they're less than 6 inches tall, but I've found that ea...
- Tool Preparation Matters: While the instructions mention sterilizing your shears, I can't stress enough how important...
Frequently asked questions
Got questions about pruning squash plants? You’re not alone!
Here are answers to the most common ones to help you grow like a pro.
Do I really need to prune squash plants?
Not all varieties need pruning—bush squash (like zucchini) usually don’t benefit, but vining types (like butternut or spaghetti squash) thrive with strategic cuts. Pruning improves airflow, boosts fruit size, and prevents disease. Skip it only if you’re short on time or growing bush types!
When is the best time to prune squash plants?
Prune in the morning when plants are dry (to avoid fungal risks) and before flowering for vining squash. For bush types, trim after harvest to encourage regrowth. Avoid pruning late in the season—it stresses plants before frost.
How do I prune squash without hurting the plant?
Use clean, sharp pruners (or scissors) and cut just above a leaf node (the bump where leaves grow). Never remove more than 1/3 of the plant at once. For vining squash, focus on side shoots and male flowers—never the main vine!
What if my squash plant has too many fruits already?
Overloaded plants produce small, poor-quality fruit. Thin fruits to 1–2 per vine (for vining types) or 3–5 per bush, keeping the largest, healthiest ones. Remove smaller fruits or damaged ones first. This redirects energy to fewer, bigger squash!
Can I prune squash plants in hot or humid weather?
Avoid pruning during peak heat (100°F+) or after heavy rain—it stresses plants and invites disease. Wait for cool mornings (60–80°F) or humid afternoons with shade. If you must prune in humidity, sterilize tools with rubbing alcohol first!
Wrapping up and next steps
Pruning your squash plants is a simple yet powerful way to boost your harvest and keep your garden thriving! 🌱 By focusing on removing suckers, thinning vines, and trimming overgrowth, you’ll encourage healthier growth and bigger yields.
Remember, timing and technique matter—always use clean tools and prune during the right growth stage.
Now that you’re armed with these tips, grab your pruners and get growing! 🌟 Try pruning just one plant this season and compare its yield to unpruned ones—you’ll see the difference. Happy gardening, and here’s to a bountiful harvest ahead!