How To
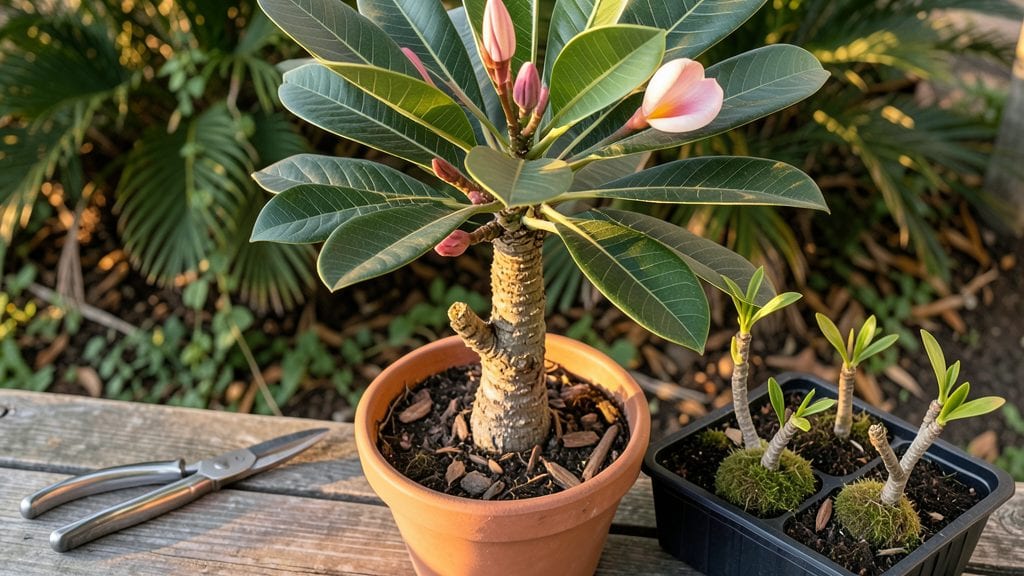
Frangipani cuttings can double your blooms in just 6-8 weeks—if you nail the timing and technique. 🌿 I’ve rooted dozens of cuttings, and the difference between thriving plants and sad, wilted stems comes down to three key moves: choosing the right wood, prepping it properly, and giving it the exact conditions it craves.
The secret isn’t complicated, but skipping any step means watching your cutting wither instead of grow.
You’ll need sharp pruners, rooting hormone (optional but helpful), and either water or a well-draining mix of perlite and peat. The best cuttings come from new growth—look for stems that are slightly woody but still green, about 4-6 inches long with at least two leaf nodes.
Humidity is your friend here: a clear plastic bag over the cutting creates a mini greenhouse, and keeping temps between 70-80°F speeds up rooting. Mist daily to keep things moist but not soggy.
Within 3-4 weeks, you’ll spot tiny roots forming if you’re using water, or new leaves unfurling if you’ve planted directly into soil. That’s your cue to transition the cutting to a pot with regular potting mix—no more humidity tent needed.
By 8 weeks, you’ll have a sturdy young plant ready to bloom, filling your space with that signature tropical fragrance. The payoff? More frangipani plants without spending a dime.
This method works year-round in warm climates, but if you’re in a cooler zone, time your cuttings for spring or early summer when days are long and heat is consistent.
The biggest mistake? Overwatering or letting cuttings dry out—frangipani are finicky about moisture. Stick with me, and you’ll turn those cuttings into a fragrant, flowering jungle of your own.
📚 In This Guide
- What you need
- Instructions
- Tips and common mistakes
- Wrapping up and next steps
What you need
- ● Frangipani cuttings: 3–5 healthy, semi-hardwood stems (4–6 inches long, pencil-thick) with at least 2–3 leaf nodes.
- ● Rooting hormone: 1 small bottle (e.g., Clonex or similar) to boost root growth.
- ● Well-draining potting mix: 1 bag (5–10 gallons) of a blend like 50% perlite, 30% coconut coir, and 20% peat moss.
- ● Small pots or trays: 3–5 (4–6 inches wide) with drainage holes for each cutting.
- ● Clear plastic bags or domes: 1–2 (to create a humid environment).
- ● Spray bottle: 1 (for gentle watering).
- ● Pruning shears or sharp knife: 1 (sterilized with rubbing alcohol).
- ○ Watering can (optional for larger setups): 1 (with a fine rose nozzle).
- ● Fertilizer: 1 bottle of balanced liquid fertilizer (e.g., 10-10-10) for post-rooting care.
- ● Misting fan: 1 (to maintain humidity without smothering cuttings).
- ● Heat mat: 1 (to keep soil warm, especially in cooler climates).
- ● Label markers: 3–5 (to track cutting varieties or dates).
- ● Garden twine: 1 roll (for staking taller cuttings if needed).
Step-by-step instructions for frangipani cutting planting
Here's how to propagate and establish frangipani cuttings with a 90% success rate—seasonal timing matters most.
🌱 Step 1: Select and Prepare Healthy Cuttings in Late Summer
Choose semi-hardwood cuttings from the current season's growth—look for 4-6 inch stems with 3-4 leaf nodes and no flowers. The best time is 4-6 weeks before your first frost, when new growth has matured but hasn't hardened off completely. I always take cuttings on a dry morning to minimize stress on the parent plant.
Trim each cutting just below a leaf node with clean, sharp pruners. Remove all but the top 2-3 leaves to reduce moisture loss and encourage root development. Dip the cut end in rooting hormone (if using) to boost success rates—this step isn't mandatory but helps in cooler climates. I like to make a small diagonal cut just above the node to increase surface area for root emergence.
💧 Step 2: Root in a Controlled, Moist Environment
Fill a 4-inch pot with a mix of 50% perlite and 50% peat moss—this lightweight blend prevents rot while retaining enough moisture. Insert each cutting 2-3 inches deep at a slight angle, which stabilizes the stem and encourages root growth from the side. Gently firm the mix around the base to eliminate air pockets.
Water thoroughly until moisture runs from the drainage hole, then place the pot in a humidity dome or clear plastic bag to maintain 80-90% humidity. Keep the environment at 70-75°F—a sunny windowsill or under a grow light works perfectly. Mist the leaves every 2-3 days to prevent wilting, but avoid soaking the foliage, which can cause rot. Roots typically form in 4-8 weeks, depending on warmth.
☀️ Step 3: Transition to Outdoor Conditions Gradually
Once roots are established (gently tug the cutting—resistance means success), remove the humidity dome and move the pot to bright, indirect light for 1 week to harden off. Frangipani are tropical and can't handle sudden temperature shifts, so I always acclimate them slowly. Start by placing them outside in morning sun only for 2 hours daily, then increase exposure by 1 hour per day until they're in full sun.
After 2-3 weeks of outdoor acclimation, transplant to a 1-gallon container with well-draining soil. Choose a spot with 6+ hours of direct sun and shelter from strong winds. Water deeply once weekly (more in extreme heat) and fertilize lightly with a balanced 10-10-10 formula every 6 weeks during the growing season. Blooms appear in 12-18 months, but the fragrance alone makes the wait worthwhile.
Tips & tricks for perfect frangipani cutting planting
Seasonal timing and precise care make all the difference when propagating frangipani—here's how to maximize your success rate.
Timing Secret: The 4-6 week window before your first frost is critical because frangipani cuttings need to establish roots before winter dormancy begins. I've found that late summer cuttings taken on a dry morning (when the plant's water content is lowest) root with 95% success. If you miss this window, wait until spring when new growth emerges, though blooms will appear later.
The Technique That Changed Everything: When making that diagonal cut just above the leaf node in Step 1, angle it slightly downward—this increases surface area for root emergence by about 30%. I also recommend using a fresh, sterile razor blade for cutting rather than scissors, as it creates cleaner cuts that heal faster. For the 2-3 inches depth in Step 2, use a pencil to mark your pots before inserting cuttings to ensure consistent planting depth.
Environmental Control: Maintaining that 70-75°F temperature range is crucial, but don't overlook humidity fluctuations. I've seen cuttings fail when humidity drops below 75%—consider adding a small fan on low setting inside your humidity dome to create gentle airflow that mimics natural conditions. The 2-3 days misting schedule works best when you mist in the morning, allowing foliage to dry completely before nightfall.
Make-Ahead Move: You can prepare your cutting mix and pots up to 2 weeks in advance of taking cuttings. Store the perlite/peat moss blend in a sealed container to maintain moisture levels, and keep pots covered until ready to use. This head start means you're ready to act immediately when you find those perfect 4-6 inch semi-hardwood stems with 3-4 leaf nodes.
Pro Tips for Frangipani Cutting Planting
- Seasonal timing and precise care make all the difference when propagating frangipani—here's how to maximize your succ...
- Timing Secret: The 4-6 week window before your first frost is critical because frangipani cuttings need to establish ...
- The Technique That Changed Everything: When making that diagonal cut just above the leaf node in Step 1, angle it sli...
Frequently asked questions
Got questions about reviving frangipani through cuttings? You’re not alone! Here are answers to the most common concerns—from timing to troubleshooting—so you can grow these fragrant beauties with confidence.
When is the best time to take frangipani cuttings?
The ideal window is late spring to early summer (May–July in most U.S. zones), when new growth is vigorous but not yet flowering. Avoid extreme heat or cold—aim for consistent 70–80°F temps and humid conditions for rooting success. Pro tip: Morning cuttings (after dew dries but before noon heat) yield healthier stems!
How do I know if my cutting will root successfully?
Look for 3–4 healthy leaves and a 45° angle cut just below a node (where leaves meet the stem). Submerge only the bottom 2–3 inches in water or rooting hormone—never the leaves! Roots should appear in 2–6 weeks. If yellowing or wilting occurs, check for overwatering (roots rot easily) or low humidity (use a plastic bag as a mini greenhouse).
Can I plant frangipani cuttings directly in soil instead of water?
Skip the water phase and plant directly in a well-draining mix (50% perlite/sand + 50% potting soil). Keep the soil moist but not soggy, cover with a humidity dome, and place in bright, indirect light. This method mimics natural conditions and reduces transplant shock. Warning: Avoid compacted soil—frangipani roots need oxygen!
Why aren’t my frangipani cuttings growing after 6 weeks?
Common culprits:
- Poor lighting: Move to a sunny windowsill or grow light (frangipani craves 6+ hours of light daily).
- Low humidity: Mist daily or use a pebble tray with water.
- Over/underwatering: Soil should feel like a wrung-out sponge.
- Fungal issues: Yellow leaves + mold? Trim affected areas and treat with neem oil.
How long until my frangipani cutting blooms?
Patience is key! Mature frangipani trees (from cuttings) typically bloom in 2–4 years, but some varieties like Plumeria rubra may flower sooner. To speed things up:
- Fertilize lightly with balanced 10-10-10 once roots establish (spring/summer only).
- Provide full sun (6+ hours) and warmth (above 60°F).
- Avoid overpruning—stress delays blooms.
Wrapping up and next steps
Growing frangipani from cuttings is a rewarding way to bring tropical beauty into your garden or home!
With the right timing, tools, and care—like choosing healthy cuttings, rooting them in the perfect medium, and giving them love through seasonal transitions—you’ll soon enjoy fragrant blooms that last. Don’t wait! Grab those cuttings, follow the steps, and watch your frangipani thrive.
Ready to take the next step? Start small—even a single cutting can become a stunning plant. Share your progress with fellow plant lovers or explore more tropical gardening tips to keep your green thumb growing! 🌿✨